


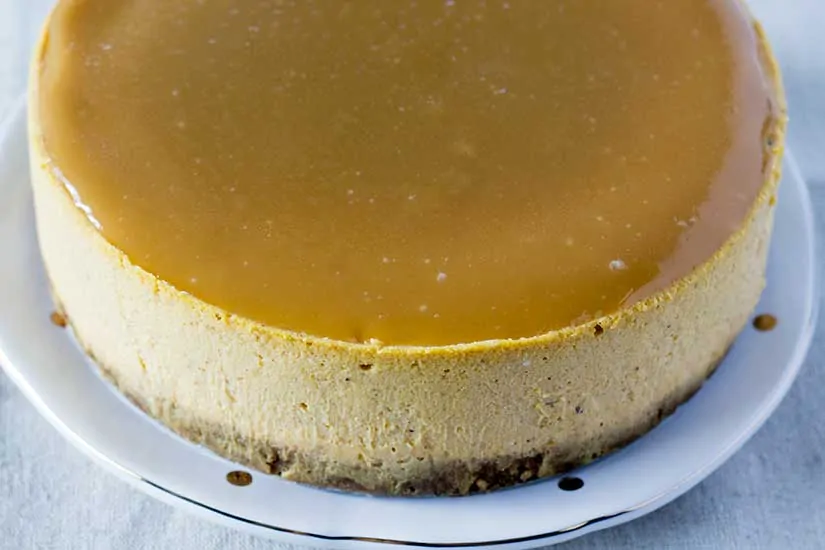
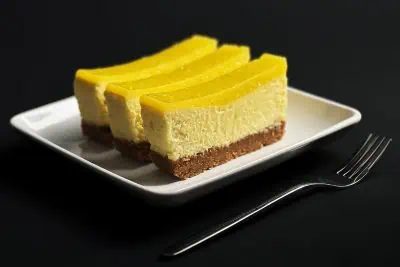
This Instant Pot pumpkin cheesecake with maple glaze is a delicious fall treat. It's a lightly sweetened, creamy pumpkin cheesecake covered in a sweet maple glaze.
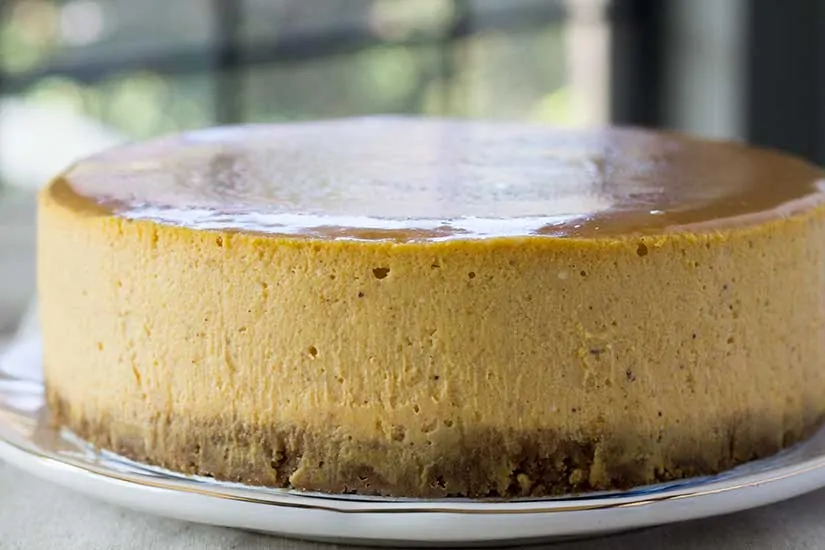
We are very excited to share this Instant Pot pumpkin cheesecake with everyone. This recipe is an adaption of a family recipe that my wife has been enjoying her whole life. Those are always my favorites! You might expect this cheesecake to be overly sweet, but it's not. The cheesecake itself is lightly sweetened, which pairs perfectly with the sweet maple glaze.
Why This Recipe Works
- The flavors in this cheesecake are well-balanced: the cake itself is lightly sweetened and tart and pairs well with the very sweet maple glaze.
- This is a perfect dessert for pumpkin lovers who are not fans of pumpkin pie. Like me!
- Instant Pot cheesecakes are a breeze to make. Since they naturally use steam for cooking, there is no need for the water bath that's required for oven baking.
What You'll Need
How To Make Instant Pot Pumpkin Cheesecake

 or springform pan. Shake the pan lightly to distribute crumbs across the pan, then use a spatula or fingers to even them out.
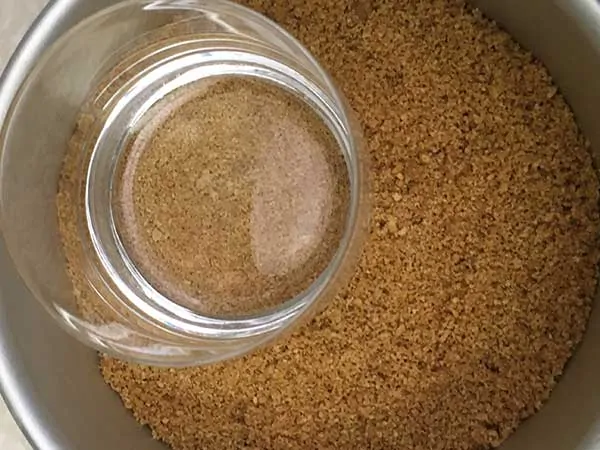

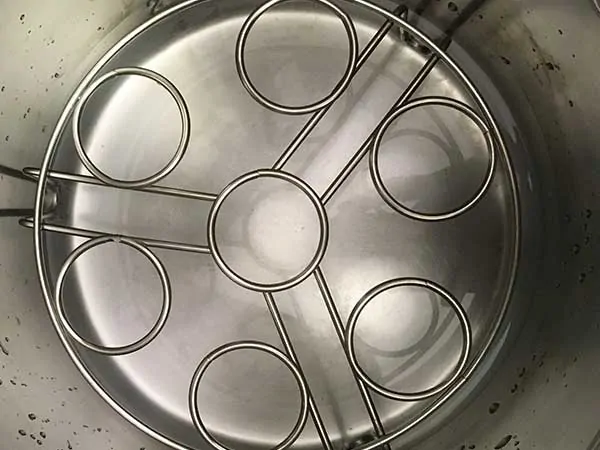
 into a 6-qt and add 1 ½ cups water.
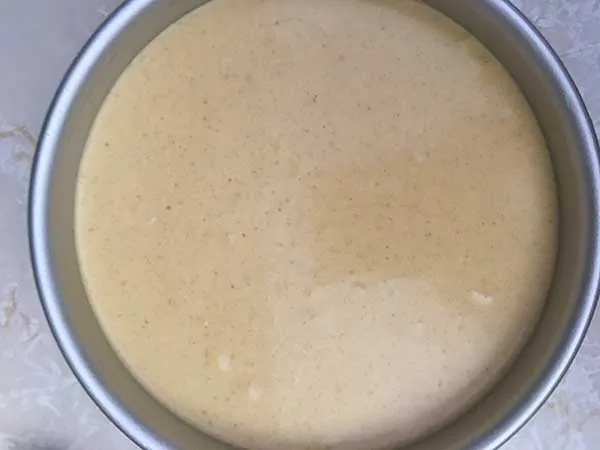
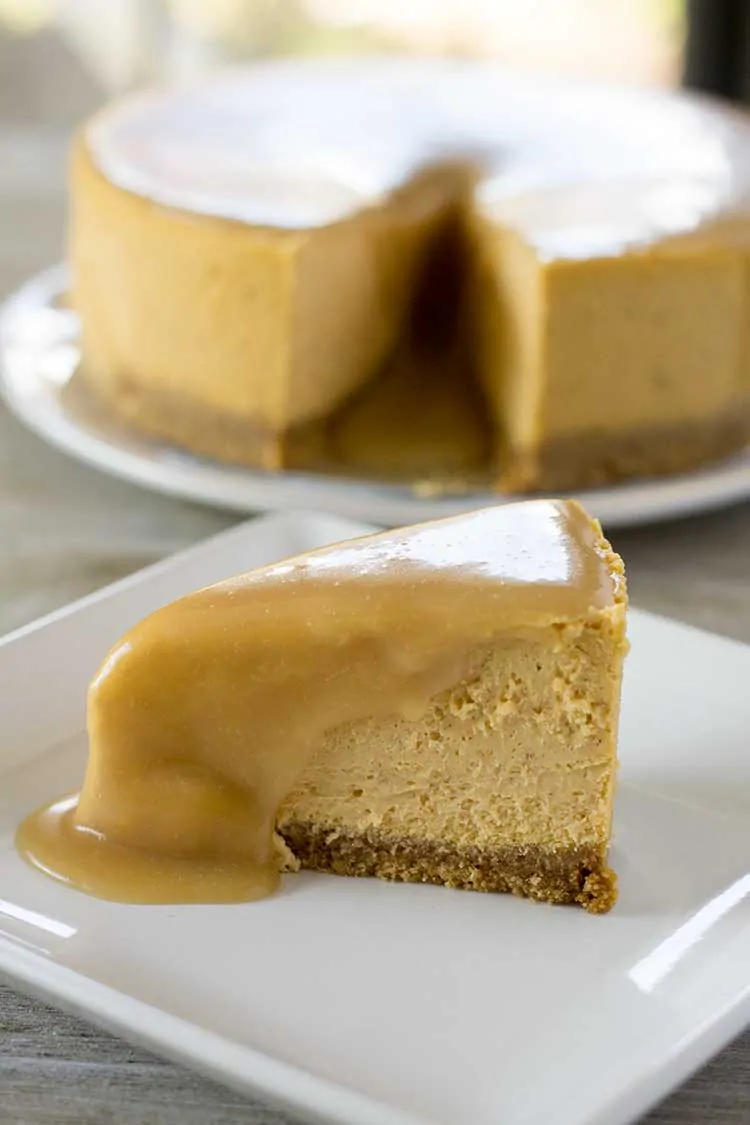
And this is the AMAZING Result…
Expert Tips
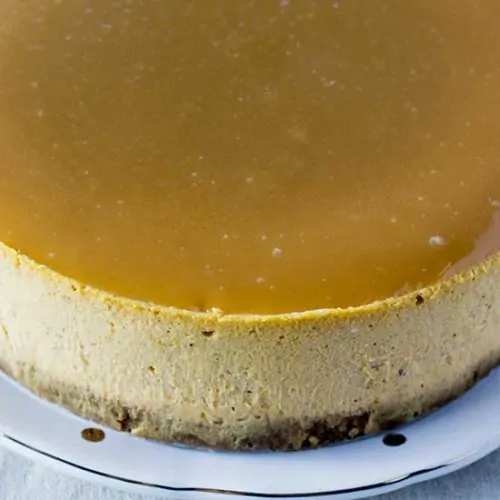
- While the maple glaze is optional, it adds a unique and delicious richness to the cheesecake. When cooking, if the maple glaze doesn’t thicken within five minutes, put it back on sauté and heat for a minute or two longer. It should be a nice caramel color, as pictured in the process shots above when it’s ready to be removed from the heat.
- If you plan to skip the maple glaze, you'll want a smooth, blemish-free cheesecake. After pouring the cheesecake batter into the pan, gently tap the pan against the counter to encourage air bubbles to rise to the top. Then, carefully burst the air bubbles with a toothpick or the tine of a fork.
- When slicing a cheesecake, I recommend using a hot knife. This prevents the cheesecake from sticking to the knife and leaves cleaner slices. However, the glaze on this cheesecake often drizzles over the sides after cutting, so this step is optional. If desired, heat your knife by dipping it into a glass of hot water, then dry and slice.
FAQs
What size Instant Pot can I use? 6-quart work best. The 8-quart cookers need an additional 10 minutes of cooking time. We have not tested this recipe with the mini.
What kind/size pan will I need? Any 7-inch springform pan![]() or cheesecake pan should work for you.
or cheesecake pan should work for you.
Why isn't my glaze thickening? You probably just need to cook it a little longer. It will take approximately 5 minutes once it begins to boil. If it has not thickened by then, continue to cook on sauté for a minute or two until it is a light caramel color and just beginning to thicken.
Why won't my glaze spread? You may have overcooked it, or it may have cooled too much. It will be a light caramel color when finished. Continuing to cook past that point will turn it into sticky caramel.
A Few Other Cheesecake Favorites
- Chocolate Cheesecake
- Bailey's Irish Cream Cheesecake
- White Chocolate Strawberry Cheesecake
- Peppermint Bark Cheesecake
- Gingerbread Cheesecake
★ Did you make this Instant Pot pumpkin cheesecake?
Please give it a star rating below! ★
📖 Recipe
Instant Pot Pumpkin Cheesecake with Maple Glaze
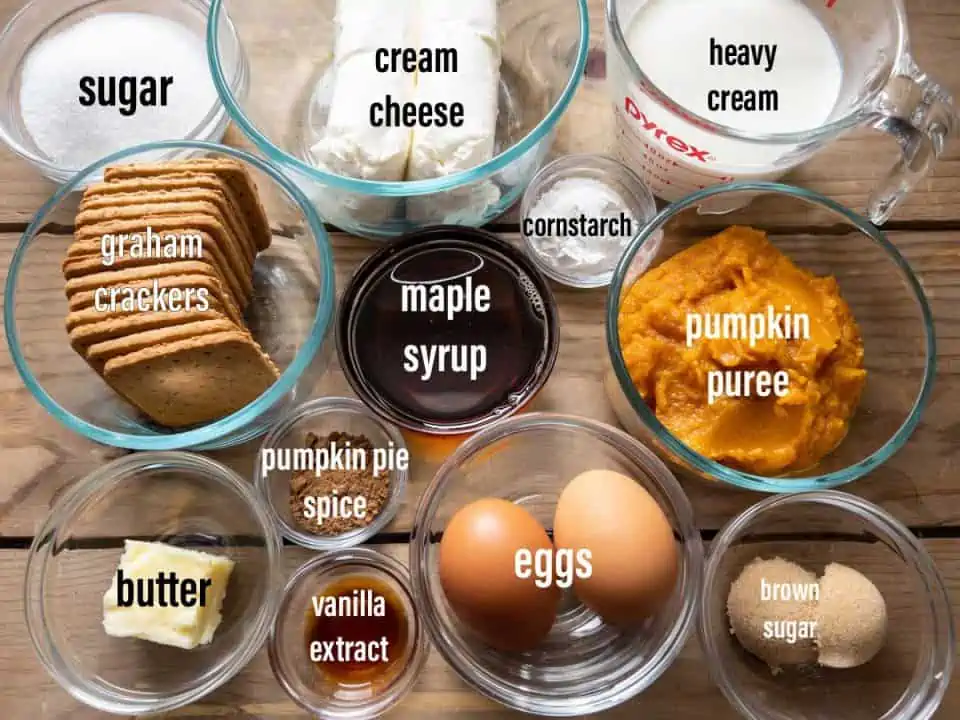
Ingredients
Cheesecake crust:
- ½ cup graham crackers crushed (about 120 grams)
- 2 Tbsp. butter melted
- 2 tsp. brown sugar
- 1 Tbsp. maple syrup
Cheesecake batter:
- 16 oz. cream cheese room temperature
- ½ cup sugar white granulated
- 2 large eggs room temperature
- ½ cup heavy whipping cream room temperature
- 1 cup pumpkin purée room temperature
- 1 Tbsp. cornstarch
- 1 tsp. vanilla extract
- 1 tsp. pumpkin pie spice
Maple Glaze
- ½ cup heavy whipping cream
- 6 Tbsp. pure maple syrup
Instructions
Cheesecake crust:
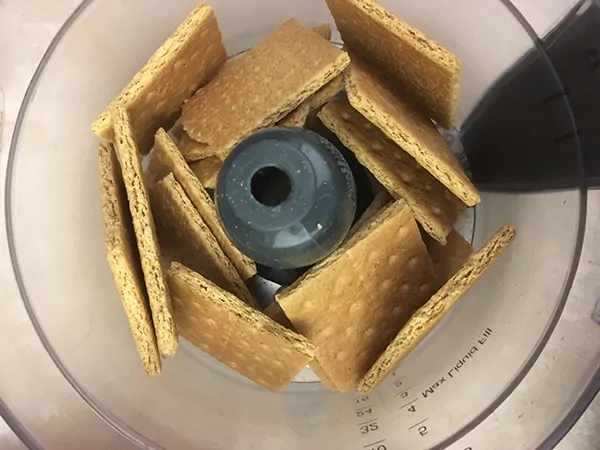
- Place graham crackers in a food processor or blender and blend into fine crumbs.
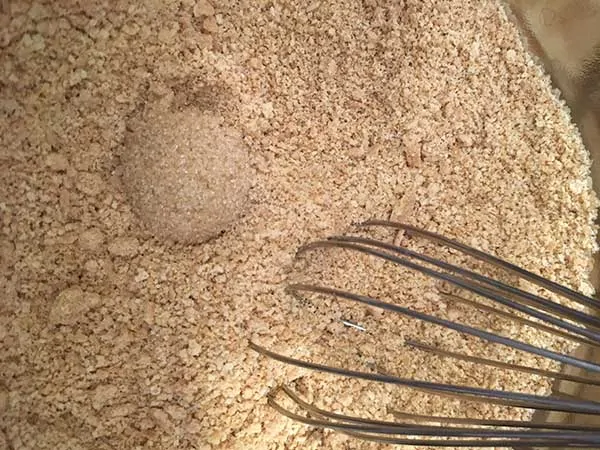
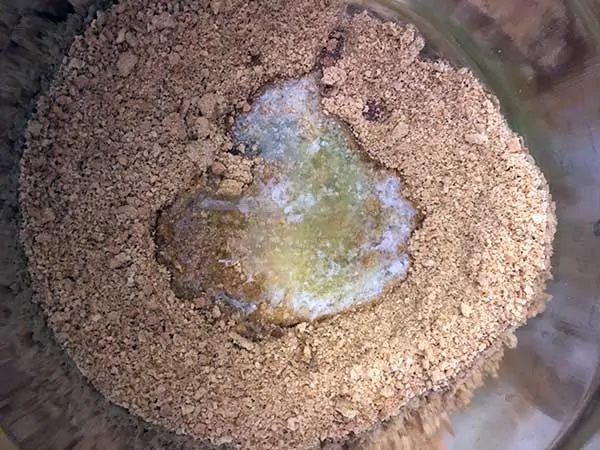
- Transfer graham cracker crumbs to a medium bowl and combine them with brown sugar. Add melted butter and syrup and stir until well combined.
- Pour the crumb mixture into a 7x3" cheesecake or springform pan's bottom. Shake the pan lightly to distribute crumbs across it, then use a spatula or fingers to even them out.
- Use the bottom of a glass or mason jar to press the crumb mixture firmly and evenly until you have a consistently even crust layer. Then place it in the freezer while you make your batter.
Cheesecake Batter:
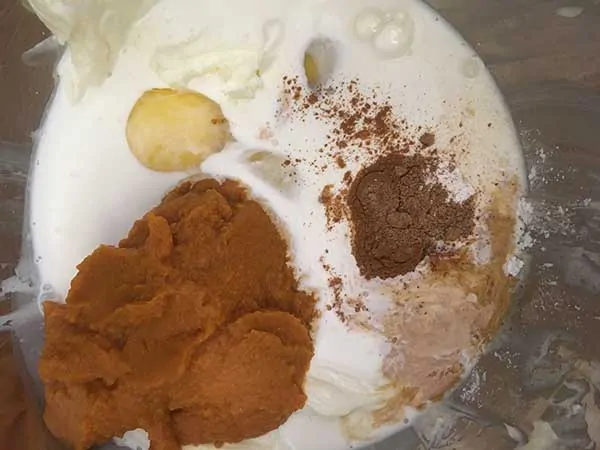
- (For best results, all ingredients should be at room temperature before beginning.)In a large mixing bowl, combine cream cheese and sugar on low speed until light and fluffy, using a hand or stand mixer.
- Add remaining ingredients and continue beating until well combined and smooth, scraping the sides and bottom of the bowl with a spatula as you mix.
- Remove the crust from the freezer and pour the batter into the pan.
Cooking Instructions:
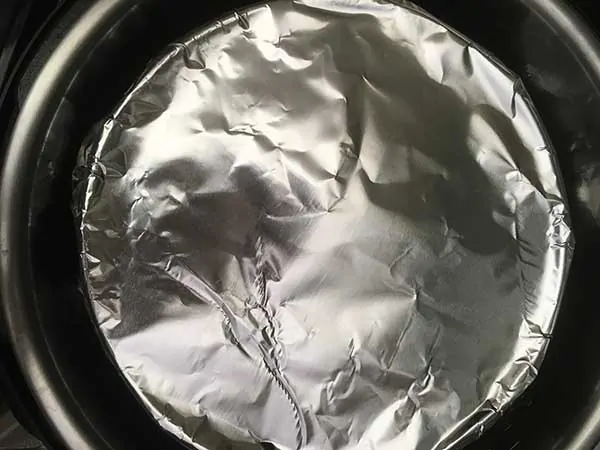
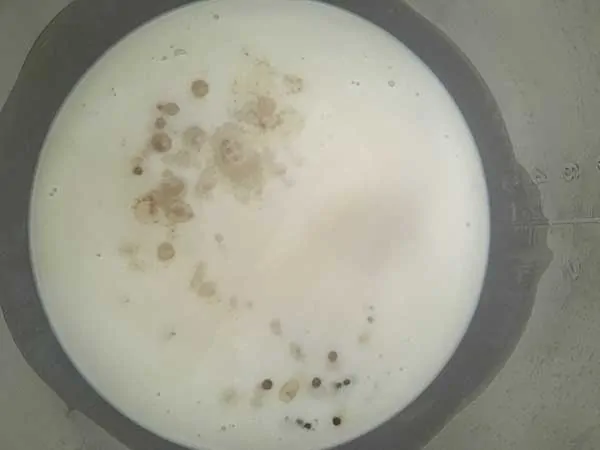
- Place a 3" trivet into a 6qt pressure cooker and add 1 ½ cups water.
- Cover pan in foil and carefully place into the pressure cooker on top of the trivet. Cook at high pressure for 33 minutes, then allow a natural pressure release (will take from 20-30 minutes).
- Remove the lid and carefully transfer the cheesecake to a cooling rack. Remove foil and gently use the corner of a paper towel to dry any water that may have gathered around the edges of the cheesecake. (This can leave marks on the cheesecake if not done carefully and is an optional step.)
- Allow cheesecake to cool for one hour. Once cool, carefully run a paring knife around the edge of the cheesecake to separate it from the pan. Refrigerate for at least 6 hours, preferably overnight.
- Carefully push cheesecake up from the pan by placing the center of the pan on top of a can or glass and pushing the edges down. If using a springform pan, gently remove the outer edge of the pan.
Maple Glaze:
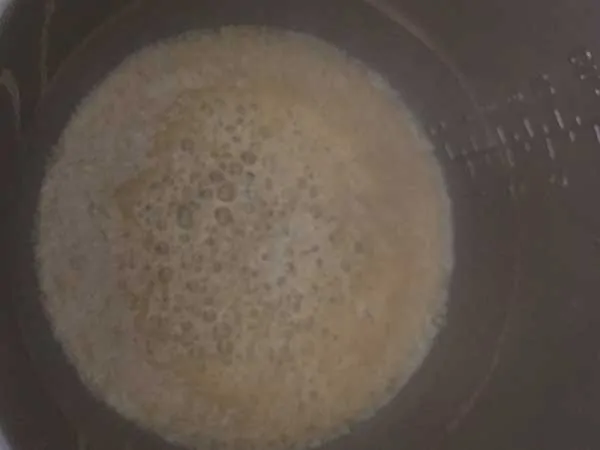
- Prepare glaze after the cheesecake has been refrigerated for a minimum of six hours and is ready to be served. Add heavy cream and maple syrup to an empty and clean pressure cooker.
- Using sauté setting... Set a timer for five minutes. The cream and syrup will begin to boil and bubble. Stir often. The color will start to change to a light caramel color and thicken slightly.
- After five minutes, immediately remove the pot from the pressure cooker and allow it to cool.
- Once cooled, pour the glaze over top of the cheesecake. Cheesecake can be refrigerated with the glaze or served immediately.
Video
Notes
Expert Tips
- While the maple glaze is optional, it adds a unique and delicious richness to the cheesecake. When cooking, if the maple glaze doesn’t thicken within five minutes, put it back on sauté and heat for a minute or two longer. It should be a nice caramel color, as pictured in the process shots above when it’s ready to be removed from the heat.
- If you plan to skip the maple glaze, you'll want a smooth, blemish-free cheesecake. After pouring the cheesecake batter into the pan, gently tap the pan against the counter to encourage air bubbles to rise to the top. Then, carefully burst the air bubbles with a toothpick or the tine of a fork.
- When slicing a cheesecake, I recommend using a hot knife. This prevents the cheesecake from sticking to the knife and leaves cleaner slices. However, the glaze on this cheesecake often drizzles over the sides after cutting, so this step is optional. If desired, heat your knife by dipping it into a glass of hot water, then dry and slice.
FAQS
What size Instant Pot can I use? 6-quart works best. The 8-quart cookers need an additional 10 minutes of cooking time. We have not tested this recipe with the mini. What kind/size pan will I need? Any 7-inch springform panNutrition
THIS POST MAY CONTAIN AFFILIATE LINKS. TO FIND OUT MORE VISIT OUR DISCLOSURE PAGE.


Donna
Can I make this in my IP Mini? If so do I just half all ingredients and what about the time? Thanks
Chef Gary
Hi Donna! We have not tried this in an IP Mini, so unfortunately I am not able to advise on time or measurement adjustments.
Jerry
Donna Laura P. Of hippressurecooking dot com has a very good article on adjusting recipes for the IP Mini.
Donna
Thank you
Katie
This will be perfect for Thanksgiving!
Laura
Oh my word this was soooo amazing! I think I may never make pumpkin pie again. This had incredible taste and texture...
Judith Mansfield
If I'm not using the glaze should I increase the sugar in the cheesecake?
Chef Gary
The glaze adds a richness, but the cheesecake is still sweet on it's own. We've eaten it without the glaze before, but if you prefer a richer cheesecake, you can increase the sugar.
Denise Shaw
My glaze never thickened at all. 🙁
Gary
Hi Denise, I'm sorry to hear it didn't thicken. We've never had a problem with our glaze not thickening, but my guess would be your pot took a little longer to heat fully. In the future, if the glaze doesn't thicken within five minutes, you can put it back on sauté and heat for a minute or two longer. It should be a nice caramel color, as pictured in the process shots above, when it's ready to be removed from the heat.
Rebecca
I love this! Such a great cheesecake and the maple glaze really adds something special!
Rae
My whole family loved this!
Tanya
ok i know this is kinda last minute but my pan is only 7 x 2 1/2 🙁 Do you know how much of the batter to use so it doesnt overfill? I will use the leftovers in a cupcake pan 🙂
Rachael
Sorry we didn't get back to you sooner. I haven't tried it in a 2 1/2" pan, so I'm not quite sure. I hope it worked out for you!
Chantelle
Question. For the crust it calls for maple syrup. For the glaze it calls for pure maple syrup. Is there a difference?
Gary White
No difference, we only recommend 100% pure maple syrup.
Leigh Ann
I just made this cheesecake tonight and it was delicious AND beautiful! Thank you so much for such a great recipe. Also thanks for adding the note about the glaze. I may not have cooked it long enough otherwise. Initially I thought it was five minutes from the moment I put it on the heat but it was more like 5 minutes from the boiling point. I went be the color just like you said. 😊
Gary White
So glad you enjoyed it!
Sue
Amazing! Easy to prepare, delicious to eat! I topped mine with chopped pecans