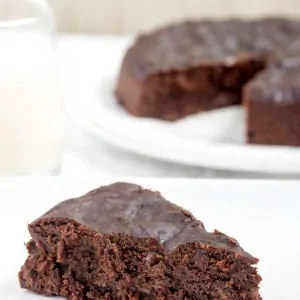
These Instant Pot brownies are easily made from scratch, with the perfect balance of cake and fudge textures. Completely addictive.
There are few desserts as perfect as a warm batch of brownies topped with some vanilla ice cream. However, I can't say that I love the texture you get from a box mix. There's just something distinct about that powder that I don't enjoy. Well, this Instant Pot brownies recipe is incredibly easy to make, and yields a perfectly balanced texture between cake and fudge. They're everything you want a brownie to be!
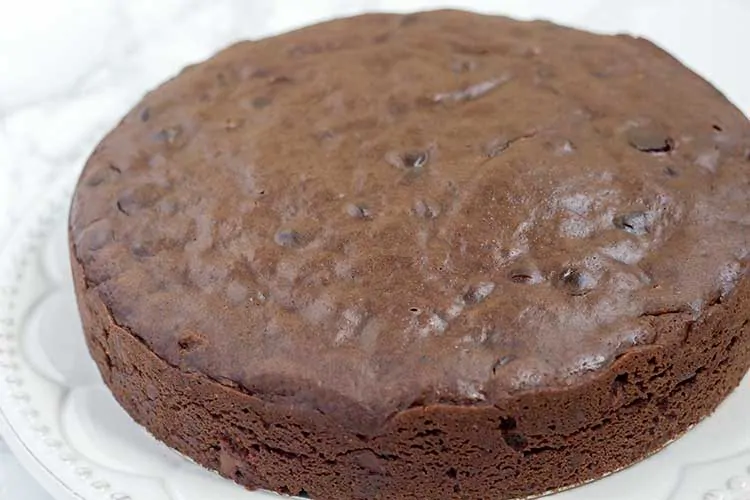
Makes a deceptively large batch!
Because we're cooking this dessert in an Instant Pot, you might not expect there to be a lot. But I'm here to tell you that you can serve a lot of people with this pan of brownies. Not only are the brownies very rich, but they're perfectly thick too. Not as thick as a slice of cake, but just the right size to cut into about 16 wedges.
Why use the Instant Pot?
One of the number one questions we get is "Why use the Instant Pot for brownies? Wouldn't the oven be faster?". While yes, oven baked brownies typically have a shorter cook time than these Instant Pot Brownies, there are several reasons I decided to give brownies in the Instant Pot a try. First, this recipe was developed in the middle of summer. Living in Florida, I prefer to avoid turning on the oven during summer whenever possible. Second, not everyone has access to an oven. Some of our readers travel with their Instant Pot, cooking from hotel rooms or campers that lack a kitchen. Others are using their Instant Pot because they're in the middle of a home renovation. And then there's those of us who love our Instant Pot so much that we'll take any excuse to cook in them. No matter what your reason is, you won't regret trying these delicious brownies!
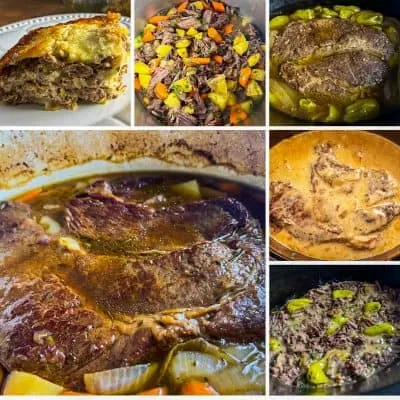
The Process
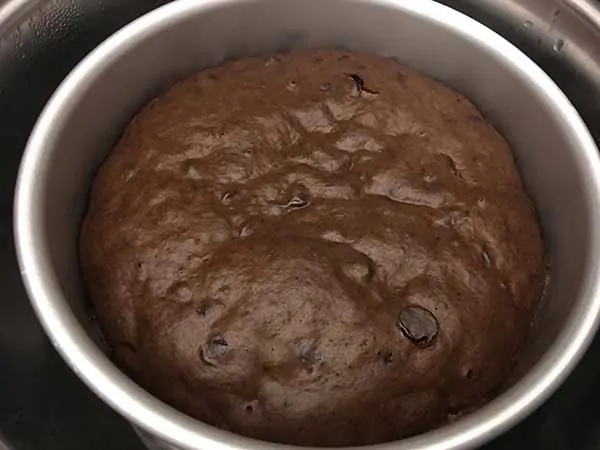
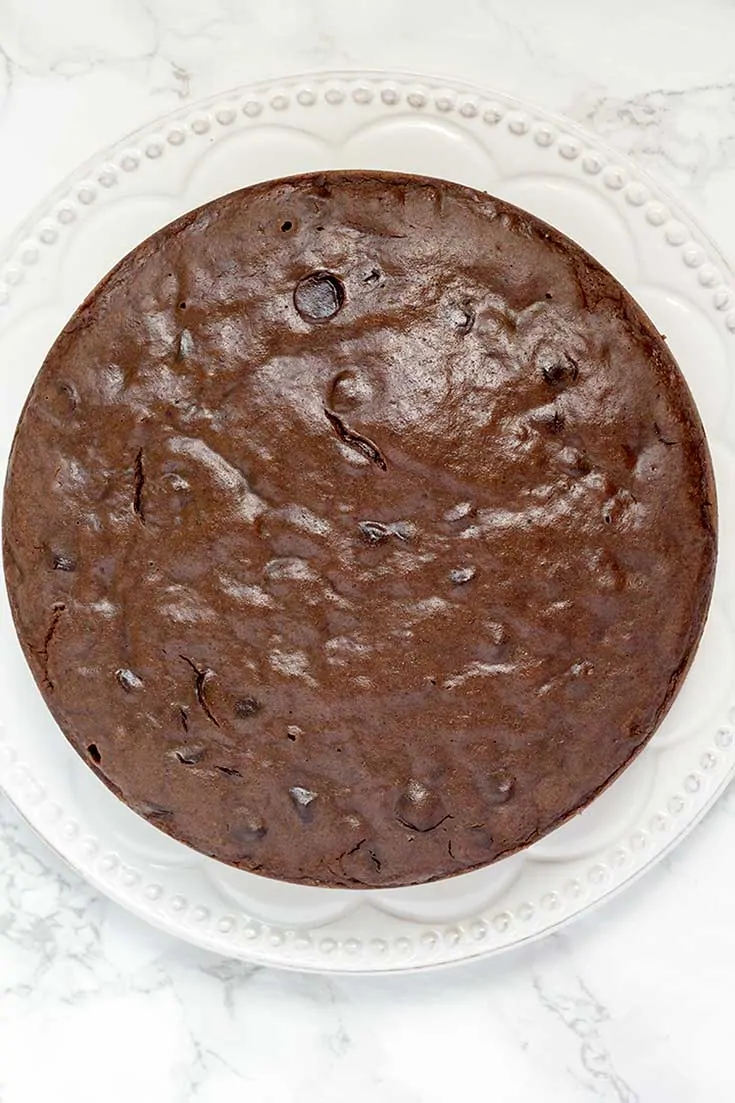
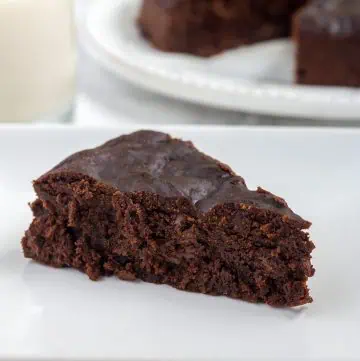
And the AMAZING Result…
FAQs
What if I don't have a 3" trivet? You can find a 3" trivet on Amazon![]() for just over $5. We haven’t tested the recipe with the trivet that comes with the Instant Pot as it would sit so close to the water. Several readers have told us that using the trivet that came with their pot worked for them, but their brownies did not rise quite as much and were a bit denser. Other readers have used a small pan turned upside down to elevate their pan.
for just over $5. We haven’t tested the recipe with the trivet that comes with the Instant Pot as it would sit so close to the water. Several readers have told us that using the trivet that came with their pot worked for them, but their brownies did not rise quite as much and were a bit denser. Other readers have used a small pan turned upside down to elevate their pan.
Wouldn't it be quicker to cook them in the oven? Please see "Why use the instant pot?" at the top of the post.
Why is the cook time so much longer than when I make brownies in the oven? There are two reasons they take longer in the Instant Pot. First, these are deep dish brownies. Second, the Instant Pot is steam baking, unlike the oven which uses dry heat. The temperature in the Instant Pot is less than in the oven.
Can I make this gluten-free? Yes! We frequently make a gluten-free version for my wife by swapping the flour for Bob’s Red Mill 1 to 1 Gluten-Free Flour. They are slightly softer in the center, but otherwise delicious. We recommend letting the batter sit for 5 to 10 minutes before cooking when using gluten-free flour.
Can I use a spring form pan instead of a push pan? Absolutely!
★ Did you make these Instant Pot Brownies? Please give it a star rating below! ★
📖 Recipe
Instant Pot Brownies
Ingredients
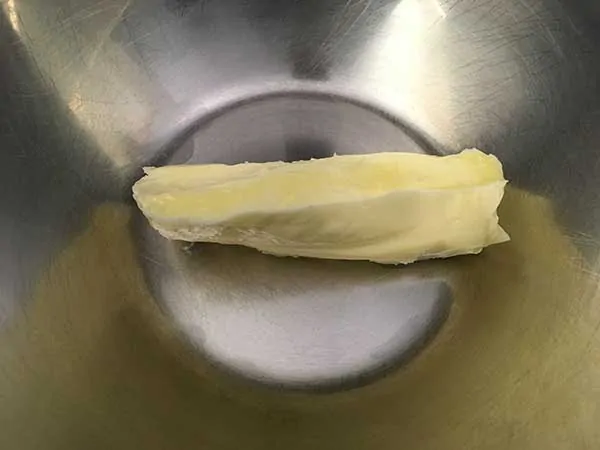
- ½ cup butter room temperature
- 1 cup sugar
- 2 eggs
- 1 tsp. vanilla extract
- ¾ cup all-purpose flour
- ½ cup cocoa powder
- ½ tsp. baking powder
- ½ tsp. salt
- 1 cup semisweet chocolate chips
Instructions
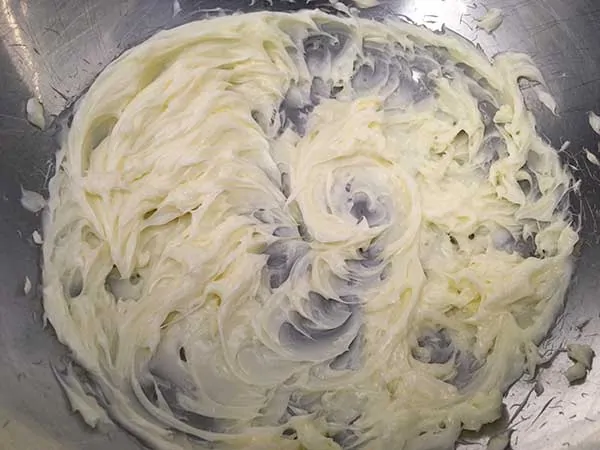
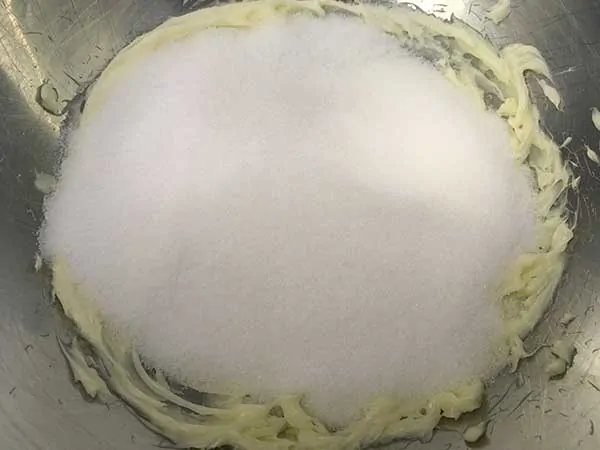
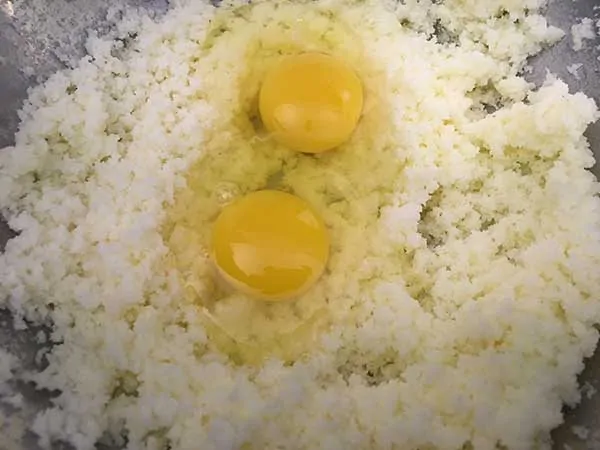
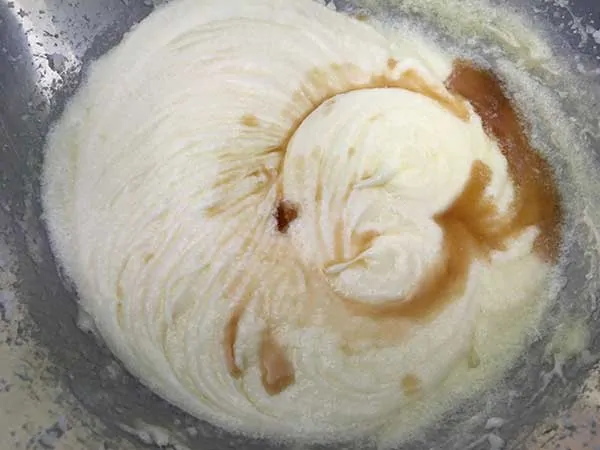
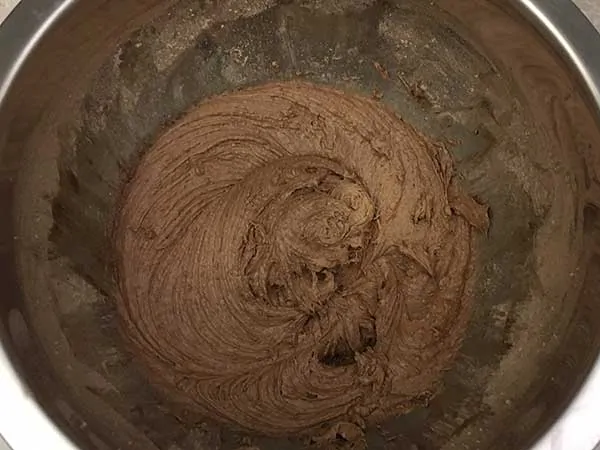
- Place butter in large mixing bowl. Using a hand mixer, mix butter just a few seconds to get it going. Then add sugar and continue mixing until fully combined. Add eggs and blend until fully incorporated. Add vanilla extract and mix again.
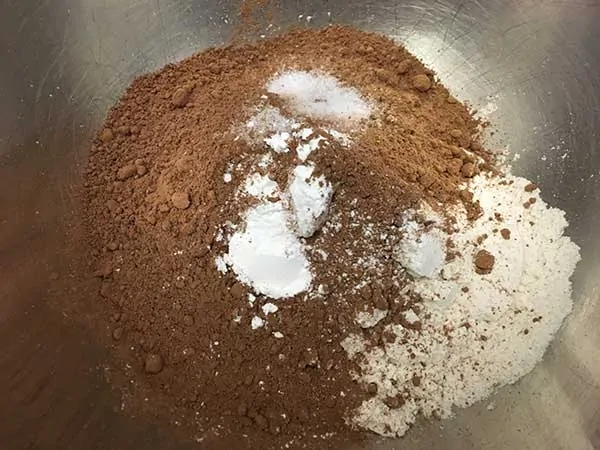
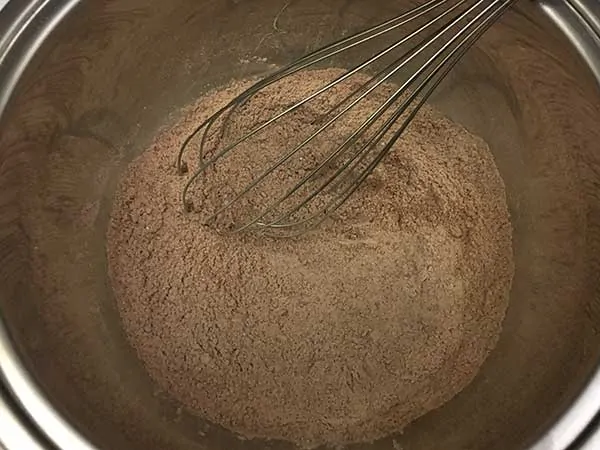
- In a separate mixing bowl, add all dry ingredients: flour, cocoa powder, baking powder, and salt. Whisk together until combined.
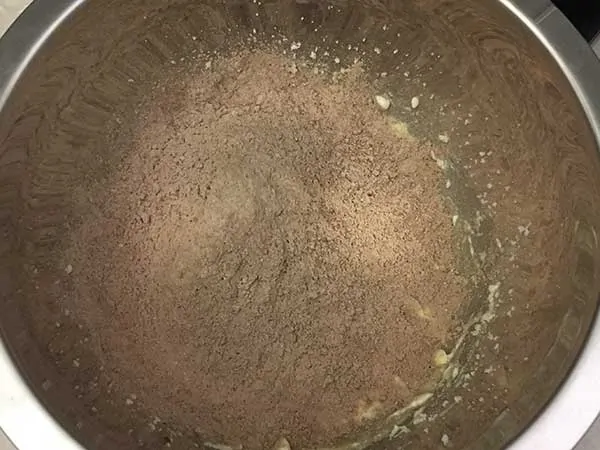
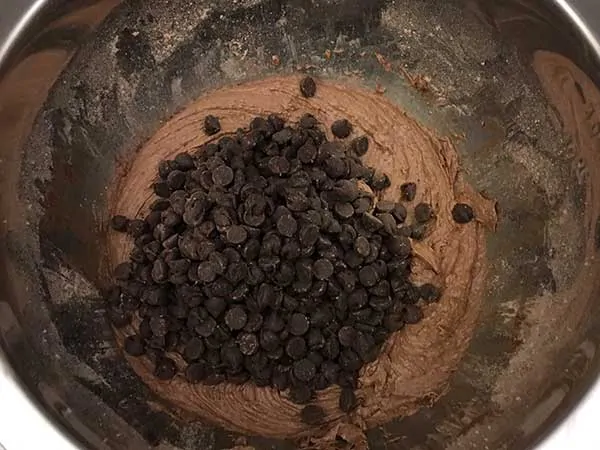
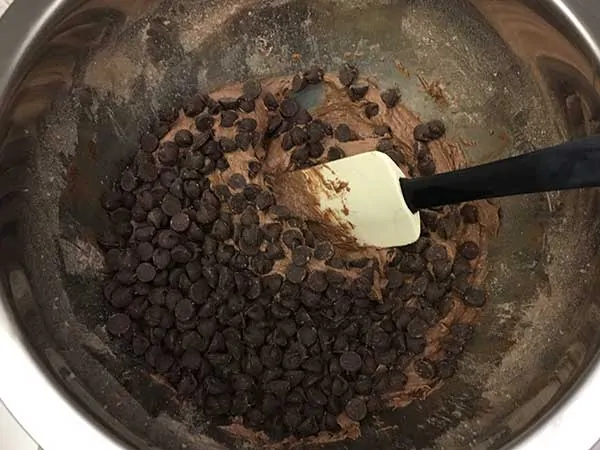
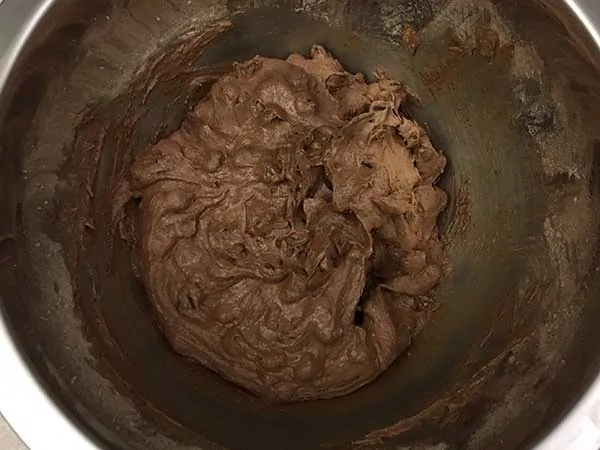
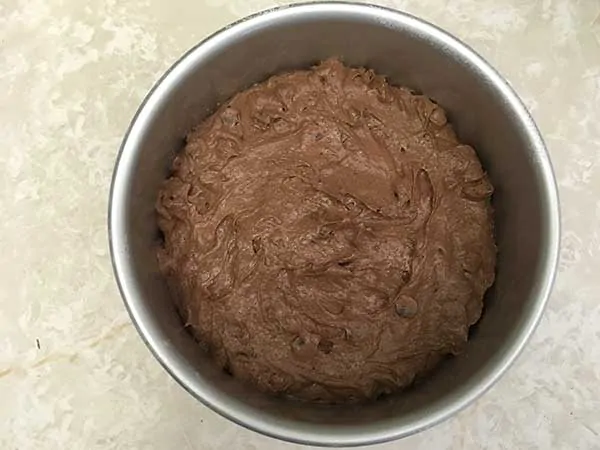
- Pour dry ingredients into bowl with wet ingredients. Gently mix until fully combined. Add chocolate chips to batter. Then, using a rubber spatula, mix well.
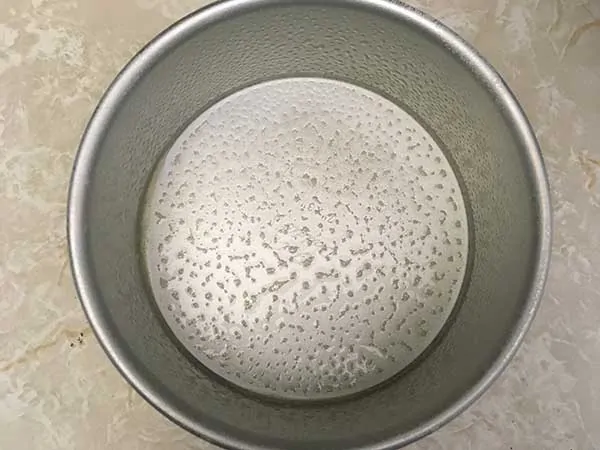
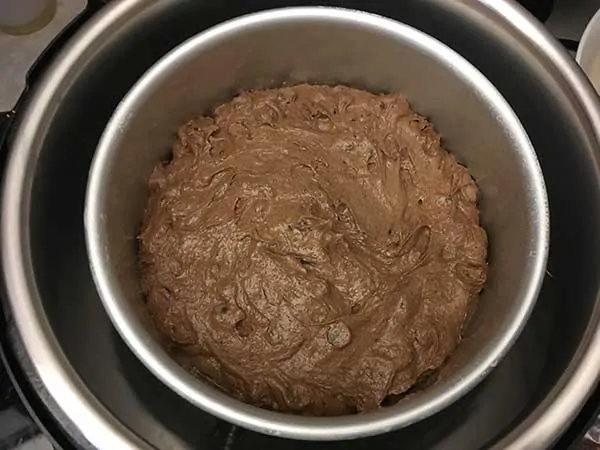
- Spray a 7×3 push pan with nonstick cooking spray. Pour batter into pan and spread out evenly.
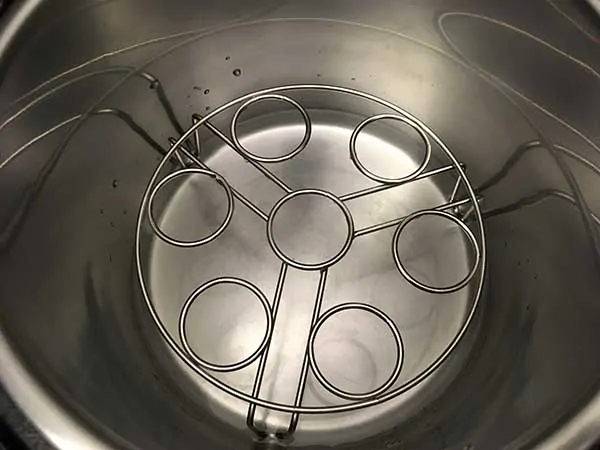
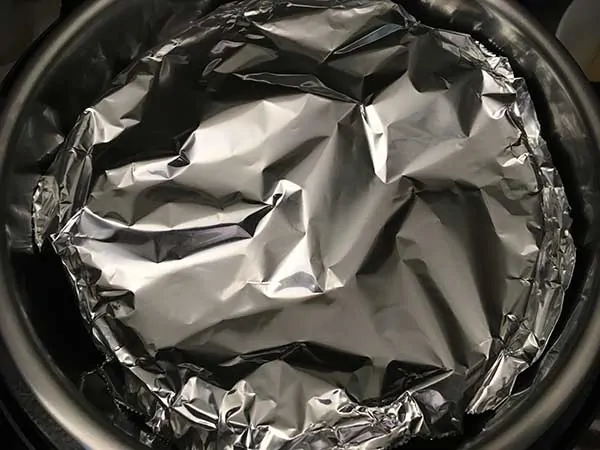
- Add a 3-inch trivet and 1 ½ cups of water to cooker. Place push pan on top of trivet. Cover pan with aluminum foil. This will keep out moisture.
- Lock lid and cook for 50 minutes at high pressure. Once cook time is complete, allow pressure to release naturally for 10 minutes. Then quick-release remaining pressure.
- Remove pan from cooker, take foil off and allow brownies to cool in the pan for about 10 minutes before removing from pan.
- Serve warm with vanilla ice cream!
Video
Notes
- Store cut brownies in an airtight container at room temperature for 1 to 2 days. A full pan's worth, uncut, can be stored for as long as 4 days, or in the freezer for 3 months.
- You can find a 3″ trivet on Amazon
 for just over $5. We haven’t tested the recipe with the trivet that comes with the Instant Pot as it would sit so close to the water. Several readers have told us that using the trivet that came with their pot worked for them, but their brownies did not rise quite as much and were a bit denser. Other readers have used a small pan turned upside down to elevate their pan.
 - To make these gluten-free, swap the flour for Bob’s Red Mill 1 to 1 Gluten-Free Flour. They will be slightly softer in the center, but otherwise delicious. We recommend letting the batter sit for 5 to 10 minutes before cooking when using gluten-free flour.
- Why is the cook time so much longer than when I make brownies in the oven? There are two reasons they take longer in the Instant Pot. First, these are deep dish brownies. Second, the Instant Pot is steam baking, unlike the oven which uses dry heat. The temperature in the Instant Pot is less than in the oven.
Nutrition
More Instant Pot dessert recipes:
- Halloween Brownies in the Instant Pot
- Instant Pot Banana Bread with Peanut Butter and Chocolate
- Instant Pot Pumpkin Cheesecake with Maple Glaze
- Gingerbread Cheesecake in the Instant Pot
- Instant Pot Pumpkin Bread Made from Scratch
THIS POST MAY CONTAIN AFFILIATE LINKS. TO FIND OUT MORE VISIT OUR DISCLOSURE PAGE.
Rebecca
I love finding new recipes for my instant pot, especially ones that the end product is as good as this one.
And I understand you having to throw them away, it is very hard to have self control when these are in the
house.!
Sandy
What could I use if I don't have a 3" trivet? Mine came with a very short one.
Chef Gary
You can find a 3" trivet for under $10 on Amazon.com. We haven't tested the recipe with the trivet that comes with the Instant Pot as it would sits so close to the water. However, if you try it please let us know how it works for you!
honda4fun
I was thinking you could use a small pan upside down as a stand.
Chef Gary
Someone mentioned on Facebook that they've had success doing that in the past.
Amy
I used the trivet that came with mine. I felt the brownies needed a bit more cook time so I cooked for 10 more minutes in the IP- but I am at high altitude so that may be a factor in the cook time. My son LOVED the brownies and said they were the "best brownies."
Brittany S
I just finished making this and I used the trivet that came with the IP as my 3" trivet put the pan up too high. It turned out fine, not as fluffy as the picture on here looks but it tastes amazing and that's all that counts! Will make this again. Thank you so much for the recipe!
Rhonda R Sneed
It has to be for 50 min or less thanks
Gary White
It needs to be at high pressure.
Kristen
Wouldn’t it be quicker to just bake them in the oven?
Chef Gary
There are certainly many recipes for oven baked brownies out there with a 30 to 35 minute cook time. When developing this recipe, we weren't going for the quickest method. Instead, we were looking for a way our readers could use their Instant Pot to make delicious brownies from scratch. We've heard from readers who don't have access to an oven; some are on the road traveling with their Instant Pot, others are going through a kitchen remodel, and some who do have access to a oven just don't want to crank it up in the middle of summer. And then there are people who just love using their Instant Pot any chance they get. 🙂
Olga
What if you like it gooey? How long should I set it?
Chef Gary
Id say try cooking it for 40 minutes instead of 50. At least that's what I'd try.
Donna
Hi I’m new to instant pot baking what does it mean to cook it 50 minutes and 10 minutes then do I do a quick release so after the 15 minutes you let the steam out for 10 minutes on its own natural release? What is a push pan? Is there a specific pan to use for instant pot? Thank you
Gary White
Yes, you have the right idea for the timing. Push pan is a nickname for a cheesecake pan. There is a link to the type we used in the post.
Agos
These look so good, I would love to make them! But I feel like 50 minutes is an awfully long cooking time for brownies. Since you usually bake them for 25-30 minutes in the oven... any particular reason for this?
Chef Gary
Hi Agos! There are two reasons they take longer in the Instant Pot. First, these are deep dish brownies. Second, the Instant Pot is steam baking, unlike the oven which uses dry heat. The temperature in the Instant Pot is less than in the oven.
Climbergirl
6 quart? And will it halve for a 3 quart?
Chef Gary
We used a 6-quart IP. I'm sorry, I'm not sure the 3-quart.
Ann
Made it as described, came out delicious. So moist it melts in your mouth. And I don’t even like brownies! Now I want to know what you do with left over. Is it supposed to be kept in the frig?
Christine Paton
Can I use a 7 in spring foam pan?
Gary
Yes.
Dani Rice
Thank you for sharing this recipe....I am most defiantly going to try it! 🙂
Chef Gary
You're welcome! We hope you love them as much as we did!
Sonya
Any plans for a gluten free version?
Chef Gary
We've actually made a gluten-free version for my wife by swapping the flour for Bob's Red Mill 1 to 1 Gluten-Free Flour. They were slightly softer in the center, but otherwise delicious.
Kathleen
Thank you for adding this gluten free tip
Rebecca
I do not have a push pan yet, do you have a suggestion for cooking in like a pyrex 7 inch bowl?
Chef Gary
Hmmm. That would probably increase the cook time, but I'm not sure. I'd say it's definitely worth a try though!
Jenn
I made them tonight subbing a GF flour. I let them sit for 10 minutes before starting the instant ( gluten free flour takes longer to absorb liquids). They came out very fudgy and my kids loved them. I also froze half for another time.
Mr Gee
I just got my IP last week, this is the first attempt at baking in it. You mention to bake it on HIGH - my pot has a cake setting - I am guessing that's one-and-the-same ?
I also took two small pyrex dishes, inverted them to serve as supports for the IP trivet that comes with it. Baked the recipe in a 7" pyrex-style dish - for 50 minutes., plus 10 min. natural release. I may have added too much water as well. So I wound up getting something between a soupy brownie-cake and a pudding .... LOL . And yes, I DID put foil on it when it went into the IP.
I just got too far away from your instructions I guess. I used a paper towel to sop up excess water ( condensation ) that sat on top of this ...... cake. Now, I transferred this concoction to a toaster oven, for maybe another 15 or 20 mins. Just to save it. The smell, aroma - IS wonderful. If I can't save it, no problem. I will have learned how NOT to make this !
IMPORTANT QUESTION - you say cookj on HIGH PRESSURE - does that mean the CAKE setting on a 6 qt IP ( LUX Series ) ? Or should I have ignored that and programmed it differently ??
Chef Gary
Thanks for giving this recipe try! I'd say the biggest difference in what you described is using a Pyrex dish. That will DEFINITELY change the cook time. Since baking is really more science than anything, even the smallest changes to a recipe can be disastrous! Trust me... I know this from experience all too well.
Mr Gee
FYI - My "save "was successful - we had brownie sundaes last night - SMALL ones, as they are so Super-RICH !! Thnx again !
Valerie Palmer
YOU DID NOT ANSWER ABOUT CAKE SETTING VS PRESSURE COOKING?
Chef Gary
Sorry for the delay... we’re getting ready for a baby to be born any minute now. I don’t know about the cake setting. I always use the regular 6qt. IP so that anyone can my my recipes. Not sure about some of the others’ functionality.
Timaree
The cake setting is high pressure. It’s just a preset time which may or may not work for any recipe you use. It is no different in pressure than using the manual or pressure cook button! I almost chose that pot due to the cake function till I googled and found it doesn’t do anything for you that manual doesn’t do so I chose a less expensive version.
Deepika
This is a pressure cook setting for 60 minutes at high. Cake setting is very different and it's not available in lot of is.
Cara G
OMG! These are absolutely wonderful...chocolatey, rich, cakey, slightly fudgy, and so delicious! I added pecans and added 5 minutes to the cook time. I will definitely make these again!
Werra Watson
Chef Gary, any downside to using Milk Chocolate chips instead of the Semi Sweet for those who do not like the bitter chocolate?
Chef Gary
I don't think so. Those should work just fine.
Werra Watson
Chef Gary, was it a mistake that I actually weighed my ingredients? In other words when you called for 1/2 cup of Coco that weighs out at 59 grams. 1 cup of flour 140 grams and 1 cup of sugar 200 grams. It came out really dry and wayyyyy too much chocolate. I am used to baking with recipes that have the dry ingredients measured out in grams.
Chef Gary
I did not weigh the ingredients, so I'm sure there will be difference. Next time I make them, I will weigh what I use and include that in the recipe for future reference. Thanks for trying them! And the feedback.
Emily T
The measurements (1/2 cup, etc) are volume measurements — the amount that takes up that space, not the weight. Different ingredients have different weights for the same amounts, but a half-cup measuring cup always holds the same volume, no matter the ingredients. If you need conversions to metric measurements, those should be easy enough to find. 🙂
Fussell
I've made this four times now as written except with Bob's Red Mill one to one GF flour and using a 7" pyrex and it's perfect every time! Great recipe! I throw a mix of dark chocolate and semi-sweet chips in 😋
Rebecca Chambers
Amazing!
Donna Whitham
We live at 5000 feet. I halved the recipe and made it in our 3 qt IP. I increased the cooking time to an hour and the natural release to 15 minutes because of the elevation and partly because I used an oat flour instead of a wheat flour. I also added a Tbs of espresso powder and a tsp of cinnamon. It came out perfect! Similar to a molten cake! If I could post a photo, I would
Lisa
Congratulations on your baby!!!!!! Hope all is well and thank you for the brownie recipe!!!!!
Rhonda R Sneed
Can u cook this on low not high temp thanks
Shannon Alexandra
Just made these and absolutely best brownies I’ve ever had! Never again will I use stove and box mix! Will give you another reason the extra cook time was worth it. This is first time ever able to cut clean even pieces. Even down to 1/16ths! Was doubtful that 1/16th would be satisfying. But I promise you IT IS!!
Chef Gary
So glad you liked them Shannon! And thanks for the shares on social media!
Kelley
Chef Gary, I’m on a GF diet and made your IP brownies last night and they were simply delicious! Due to my GF diet I made a few changes to your recipe; substitute to Pillsbury’s GF Flour and doubled the baking soda to ensure they raised like a traditional brownie. Your recipe’s definitely a keeper and thanks for sharing!!
Gerrie
Hi,
I haven't made this yet - but can I add walnuts to it? Oh and what is a "push pan" ? Is it a removable bottom cake pan?
Thank you!
Chef Gary
Yes and yes to both of your questions! My wife loves nuts in brownies, but I'm not a fan of nuts in desserts. But it should work in this recipe.
gerrie
Thanks ! I hope baby and all are well!!
Rhonda
A push pan it came with the instant pot mine did anyways.
gerrie
These are wonderful!!! I added 1 cup of chopped walnuts and it turned out great! Thanks again!
sharon venske
what is a push pan,,,I have a spring form pan will that work?
Chef Gary
Yes, the same size spring form should work!
maryam
can you do two pans on top of each other?
Gary
That's a good question. Sorry, I have no idea!
Valerie
I just made these, and they are wonderful. I added about a teaspoon of espresso powder to the dry ingredients. Great recipe!
Gary
Espresso sounds like a perfect compliment! I might try that next time. Glad you liked them!
Nina
OMG!!!!!These are so delicious. These made the Thanksgiving dessert table. I just put paper towel and aluminium foil on top, and no moisture. Making second batch now thinking of adding a little coffee. I am also going to try the aluminium sling. To lift it out easier. Thank you for sharing.
Stephanie
I didn't scroll down far enough where it says to cook for 50min instead of 60min like it said while adding ingredients in and such, I may do a NR for 5 instead of 10min. Hope it still turns out great, the Dad and bro are supposed to be over later on today so made these and warming up some Turkey leftovers and Mac and Cheese and Asparagus later as well.
I'll update once the brownies are done:)
Susan Joos
Made these on the short trivet that came with my pot. Made them as stated except that I used triple chocolate chips, which is all I had on hand. My husband’s first comment was “Mmmm!” Eating them warm, the texture is similar to a flourless cake. We’ll see if that changes as they cool...if there’s any left! Great flavor, and it would be fabulous with ice cream!
Gary
Thanks for giving them a try Susan! Glad your husband like it.
Rebecca
What if you have a 8x3 push pan? Would you decrease the time?
Gary
I think you would be safest to keep the cook time as written.
rc
Ihave a 5 X 3 spring form pan. Will that work?
Gary
Using a 5x3 would result in much thicker brownies, which would increase the cook time quite a bit. Since I've never tested it, it's hard to say how long you'd need to cook them, or if they'd cook all the way through even with a longer cook time.
Sharon
Can you substitute a 7” spring form pan?
Gary
Yes, that should work. 🙂
Linda Stevens
hard, dry, nasty. Followed instruction to the letter. Big disappointment.
Elizabeth
These were sooooo good! I subbed gluten free flour for regular, and they were still a little gooey in the center, so I may up the cook time next time, though they were pretty good gooey so maybe not.
Jones
Now this is a good brownie recipe! Rich and gooey. The whole family approved!
E.Gilberg
Made these exactly like the recipe for super ball Sunday . All we could say was WOW, so much better than box brownies. Thanks for such an easy and delicious treat!
Gary
Once you go made from scratch, you'll never go back! Glad you enjoyed them!
Carolyn
One hour or 50 minutes at pressure? It's listed as an hour in the photo directions and 50 miintes in the recipe at the bottom.
Gary
Sorry for the discrepancy, it has been corrected. Thanks for bringing it to my attention! It's 50 minutes.
Sarah
What are we thinking for a cook time with the egg mold? Thank you!
Gary
We've never used the egg mold, so we can't recommend a time as we've never tested that.
Laurie
Try 30 minutes high pressure, then 20 minutes NPR which seems to be standard for egg mold brownie recipes.
Tessa
These turned out incredible! So moist and delicious.
Elizabeth
These were dangerously good. They disappeared in under an hour. Will definitely make again!
Natalie
These were amazing!!
Judie
Any suggestions for a began recipe or plant based?
I using sub in "flax egg" have you tested this out?
Gary
No, I have not tried flax eggs in this recipe. I've had success using them in others though.
Louise Hale
How did the flax egg work in this? I'm allergic to eggs and like to use a substitute. Also gluten free.
Tammy
These are to die for! The only thing I disagree with is how many servings. Lol. I got 8. Served them with frozen custard and it was awesome. Highly recommend,
Becky
So good, my kids ask for these all the time. We eat when still warm with a scoop of vanilla ice cream. Is it possible to cook 2 at one time? Would you cook for same time or longer?
Sue
Wonderful recipe....I used a 7” Pyrex dish (as my springform pan is only 6”. Just make sure to spray dish with Pam.....once it bakes and cools for 30 min or so, it will flip out of the dish fine. The brownies cut into wedges beautifully. Super moist and delicious!
Jeanne hoyle
These were the best brownies I’ve ever made. I’ll never make them in the oven again. No overcooked edges and just right in the middle, they were “just right” all the way through.
Nikki Farrow
So thankful to have found this site! What an amazing recipe and so easy!
Pamela
Made these with mint chocolate chips, and the house now smells amazing. Thanks so much for the recipe!
Jan Armstrong
There are times when I need to make a dessert gluten free. Have you ever used flour that is one-for-one (Bob's Red Mill) to make these brownies?
Gary White
Yes, we've made these with Bob's Red Mill 1-to-1 baking flour. Works great!
Cathy
One quick question, the nutrition information is per serving (16) correct?
Gary White
Yes, they are very rich.
Rhonda B.
We just got our IP Viva a week ago and have made a ham dinner, and baked potatoes in it, They were both delicious. I've made homemade brownies hundreds of times in the oven and figured I'd try your recipe as it was close to my homemade brownie recipe, which my bff/roommate says are the best he's ever had and his mother baked professional holiday cakes.
Here's what I did:
I used a 3" deep 7" IP springform pan lined with a parchment paper circle then sprayed it with plain Crisco cooking spray. I used milk chocolate chips instead of semisweet chips, and covered the pan tightly with Reynolds non-stick aluminum foil with the non-stick side toward the batter. In my IP, I used the 1/2" high trivet that came with my IP and the required water. I made a sling out of Dollar Tree extra wide aluminum foil making sure that I had enough length to get my pan out. I cooked the brownies per your instructions. After NPR and removing the pan of brownies, I let them cool 10 minutes then used a dinner knife (to avoid scratching my non-stick springform pan) to loosen the brownie, which was nearly black (not burned), and an inch thick. After removing the pan ring, I slid the brownies with the parchment paper onto a glass plate.
The brownies were perfect: moist, rich, and decadent with the milk chocolate chips contrasting nicely with the dark chocolate taste of the brownie itself. Brownies are perfect when the crumbs on a plate will stick to the times of a fork when pressed. I'd share my pics if I could. My bff said not to lose the recipe, so I copied it, along with the web address, to my iPad just in case the internet goes down. Thanks for sharing it.
Dena Otto
I just made these and I used the trivet provided in my 8qt which is the short one, not the 3 inch one. That made them come out an inch because of them being so close to the water. But they taste great! I’ll have to order a 3 inch trivet for my next batch! Thank you for this recipe
Julie McKey
Mine burned in the instant pot. Everything was mixed right and then i took it out and it was not cooked all the way so i had to cook it again. So i put it back in and it over cooked. Im not happy.
Gary White
Julie, did you cook this directly in your Instant Pot? It is meant to be cooked inside a 7 inch pan, set on a trivet, with water under the trivet. If it is cooked in this way it will be impossible to burn it, as it will cook with steam. You can scroll up above the recipe card to see step-by-step photos of the process, or view the video tutorial. 🙂
Cynthia
This might be a silly question but this is all new to me so I want to make sure I am doing it right. How important is it that the pan you use is 3" deep?
Gary White
You want to make sure that the pan is deep enough, as they will rise while cooking. How deep is the pan that you have?
Noah Kwant
Can you make the brownies without chocolate chips because we ran out from making this recipe so many times. Will it just make the texture different or completely change the taste?
Gary White
We haven't tested it, so it's hard to say. The texture certainly would not be as fudge-like without the chocolate chips. Let us know if you try it!
Wendy
This was really good. It reminded me of tortes I’ve had. Really delicious! Thank you for the recipe!
Tammi
Made these last night in my 6 qt duo. Cooked on 3" trivet (same as shown in pics actually) cooked for 50 min w/10 min NR followed by QR. rested 10 mins then tried to cut and were raw in the middle still.?? I used my 7 x 3 spring form pan so not sure what happened. I am not at altitude either? Very frustrated as I feel I followed the instructions to a T. Made them for my hubby for our 29th wedding anniversary since we couldn't go out to eat. Will try again, just wondering thoughts?
Gary White
I'm sorry to hear that! We've tested the recipe multiple times and have not experienced that, so I'm not sure what caused it. Did you use all purpose white flour? If it happens again, you can try popping it back in the IP for an additional 5 minutes.
Lory O
Brownies are cooking now. I would love to know what brand of spatula you use. I can’t find 1 that scrapes that clean
Judy Thomas
I made these tonight and they were absolutely delicious. So moist and chocolaty and just the right amount for 2 people. I used a springform pan and it worked great. Thanks for sharing your recipe.
Trudy
My pan is 8X3. How will that affect cooking time?
Gary White
No, time should be the same.
Barb B.
I goofed. I put this in a 9” springform pan and it won’t fit in my 6 qt. IP. I was going to put it in my 8 qt, IP, but didn’t know how long I should have cooked it. So it’s in the oven. I will try this again with the right size pan. All of the reviews sound wonderful. Can’t wait to taste it.
Cheri
Love. These. BROWNIES! I could totally eat them all by myself, thanks so much for sharing this!
Katie
I just made these and they are delicious. I added a little more chocolate chips and I combined milk chocolate / semi sweet.
Ben Boven
Whoa. At first I thought they were 'ok'. That was hot out of the pan. You let these sit overnight on the countertop? Game Changer. Fudgy like I know what I'm doing. Just awesome. Super easy to make, like 5-10 minutes and then press a button. This is gonna be a regular.
Darius Moolman
I was looking for a recipe to make pot browny as in the once that got you high but this is a great recipe.
Nancy
Made this last week with dark chocolate baking cocoa and it was soooo good. Going to make it again this week using light cocoa powder to see which one I like best, but I will say this, these are so easy and so good it has become a favorite for me !
Erin
I have made these at least 5x now, and I seriously will never make brownies any other way again. They are just the best!! Had company over the other night and had the brownies cooking while we had dinner. They make for a pretty presentation in a neat little slice with a scoop of vanilla ice cream and a few raspberries. They could not get over how good they were. Thanks so much for sharing!!
Deborah
these are amazing!~ An excellent and very easy recipe. i used my 6 qt instant pot and a push pan with the Instant pot silicone "lifter" and the original trivet.
Came out extra rich and fudgy even better the second day!
Ima Domom
👌
MG
When you cool in the pan after cooking, should the foil be removed? These had really deep, rich flavor. More dense like fudge than brownie, but nothing wrong with that! Thanks for the yummy recipe.
Gary White
Yes, remove the foil to cool. Glad you enjoyed them!
donna heffernan
absolutely loved this method
Robert
Swing and a miss; at least for me. I really wanted these to turn out for Super Bowl. Unfortunately they tasted like something one would buy at a vegan, no flour, no sugar, health food store. And I did follow all of the directions and included all the ingredients. Trivet, push pan, aluminum foil covered, foil sling, etc. Oh well-on to the next recipe...
Alison
Best brownies ever. Definately in my favorite list. I had to cook a lot longer but I think its my instant pot that has a problem, I have to cook everything longer.
Faye
Absolutely delicious! Ate a piece right out of the instant pot and it was chocolatey and gooey; waited for awhile to cool down ate another piece and they set up nicely and they are still wonderful. I will be making these again. Two thumbs up on this recipe.
Susi
Very fudgy and dense. Delicious. Serve with ice cream or glass of milk.
Deb
Not making this recipe again. Big disappointment. After50 minutes, top was still raw. Had to finish in the oven.
BONNIE FERGUSON
I have tried making these 3 times and every time was a complete fail.
They come out super gooey I have had to pour them onto a plate and microwave for 3 minutes.
What a hot mess? I followed the directions to a tee every time.
Why am I having such a bad turn out - it's heart breaking my baking is always amazing.
My husband wants to throw my instant-pot away
Gary White
I'm sorry to hear that! I would try increasing the cooking time by 5 minutes.
Travis
I was making these and pot roast for dinner. Both in the Instant Pot. Decided to make these first and let them sit while the roast did its thing. That was a bad idea. No one, not even the adults could keep their hands off of them. By the time I had finished searing the roast the brownies were already half gone!
These are definitely made for a brownie sundae with how rich and chocolate they are. There was no time for all that this time though. The family was enjoying them like they had never had a brownie before.
Top notch recipe. Thanks for posting it for everyone to enjoy!