
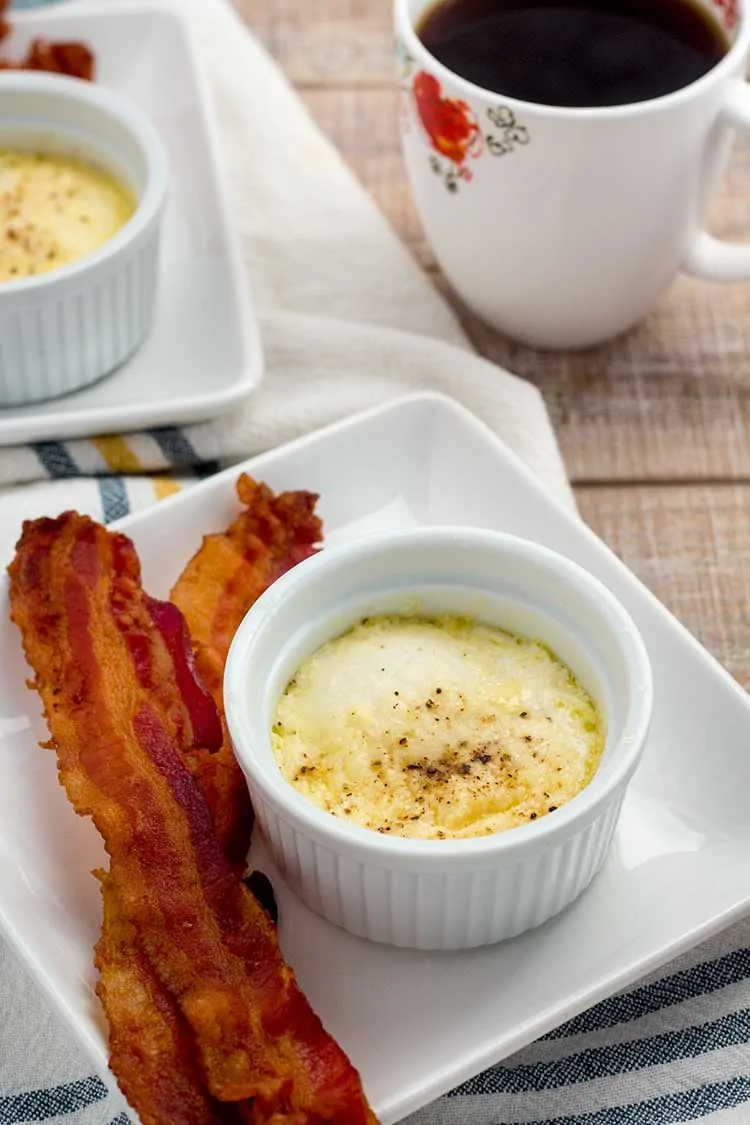
Classic French-style, creamy-filled, baked eggs make a simple, tasty, and indulgent brunch dish. Perfect for when eating a low-carb or Keto diet. Ready in minutes!
A few years ago, my wife and I came across a recipe for French baked eggs that we fell in love with. We were eating a low-carb diet at the time (something we do about once a year for a month), and this became our go-to breakfast. Fast-forward 3 years... and now every recipe that we used to make goes through the lens of "Can we cook this in our Instant Pot?" Fortunate for us, this works better than the oven version; mainly because from start to finish, we can have these done in about 10 minutes! And while these are cooking, I'm generally sautéing some spinach. There you have our typical daily breakfast... Instant Pot Eggs en Cocotte and sautéed spinach.
We even got luckier when switching to this method. The bottom layer cooks the eggs a little more than the top layer. And for a house divided on what a properly cooked egg yolk looks like, this was music to my ears! I like my yolks as close to runny as possible; while my wife prefers a more fully cooked yolk. So I take the top layer and she takes the bottom. All is good in our breakfast world.
More Instant Pot Breakfast Ideas
- Instant Pot Baked Oatmeal
- Instant Pot Banana Oat Bread
- Instant Pot Frittata with Sausage, Mushrooms and Feta
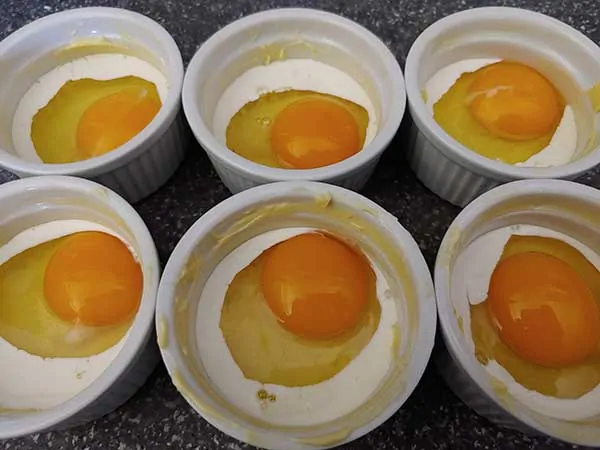
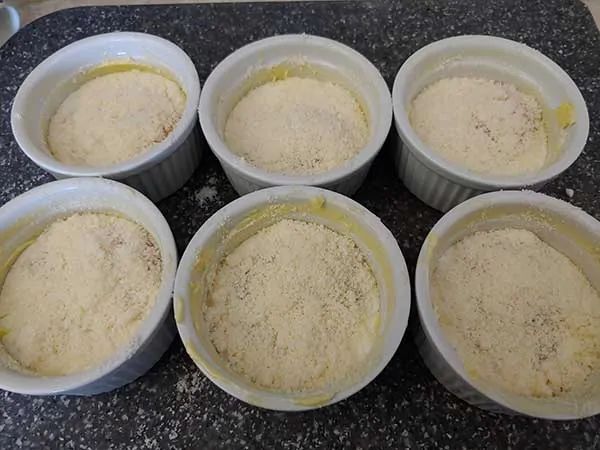
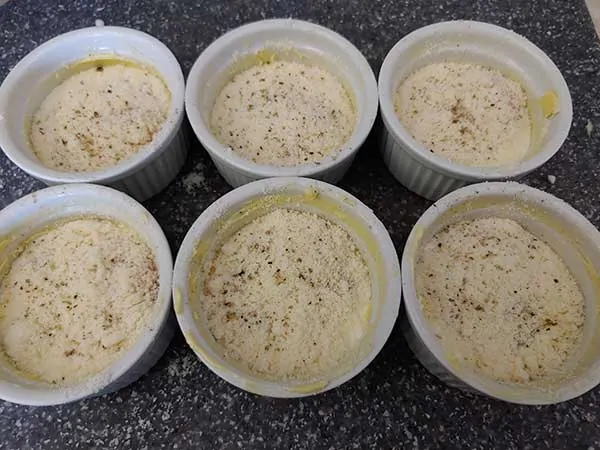
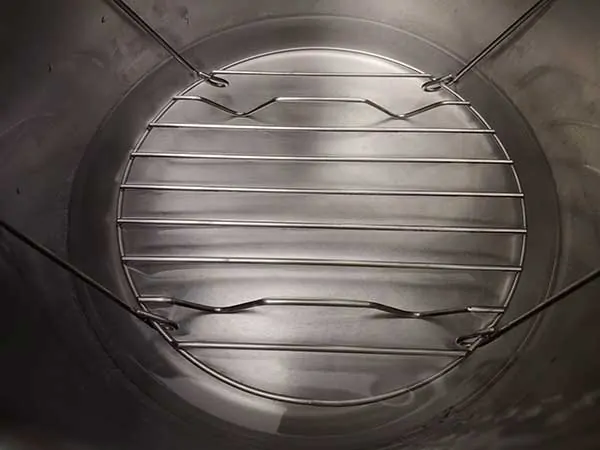
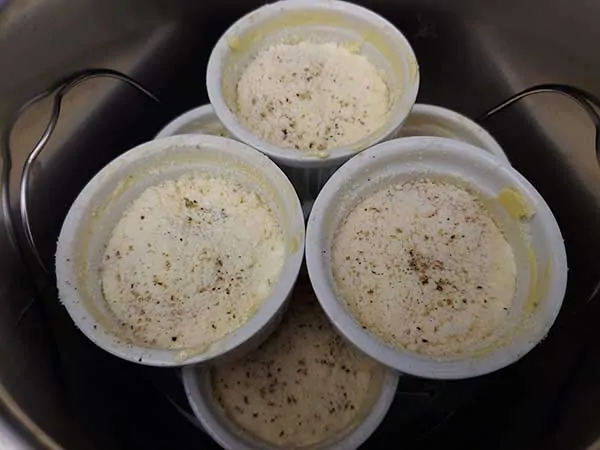
The Process

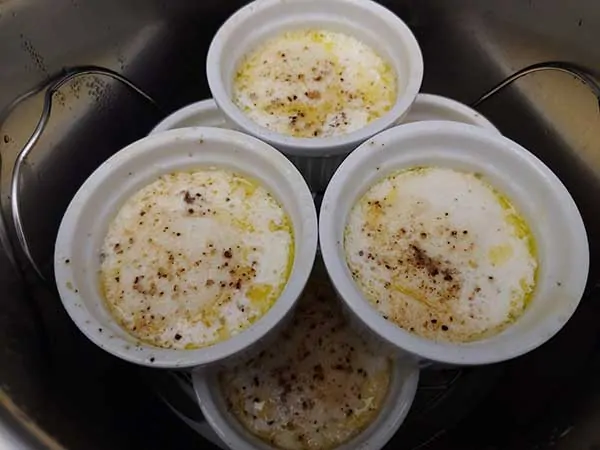
And the AMAZING Result…

Expert Tips
- The yolks in the top layer will be slightly soft with this method. If you prefer all yolks to be fully-cooked, allow a natural pressure release for 3 minutes, then quick-release remaining pressure.
- The top of the eggs will be creamy. If your whites appear runny, it may actually be the combination of cream and melted parmesan on top. Check for doneness by using a spoon to gently pull the egg white away from the side of the ramekin. If the eggs are very jiggly and undercooked, place them back in the IP and cook for 1 more minute at low pressure. Then, serve immediately or let sit on keep warm until desired doneness is achieved.
FAQs
What kind of ramekins does this recipe use? We use these 4 oz. ramekins![]() .
.
What can I substitute for heavy cream? Melted butter works for a substitute for heavy cream in this recipe.
Can I make these if my pressure cooker doesn't have a low pressure option? You can cook them for 0 minutes on high pressure, but unfortunately the eggs will be hard set. The flavor will still be delicious though!
★ Did you make these Instant Pot Eggs en Cocotte? Please give it a star rating below! ★
📖 Recipe

Instant Pot Eggs en Cocotte (French Baked Eggs)
Ingredients
- 1 Tbsp. butter softened
- 6 tsp. heavy cream
- 6 large eggs
- 6 Tbsp. Parmesan cheese grated
- cracked black pepper optional
Instructions
To make in ramekins:
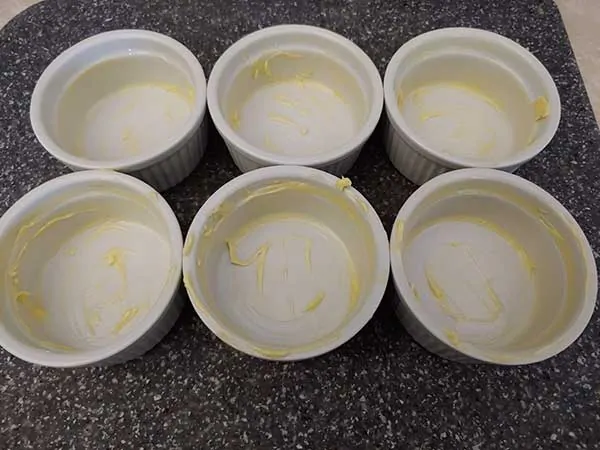
- Grease ramekins with softened butter.
- Pour in 1 teaspoon of heavy cream to each ramekin and swirl around to coat the bottom.
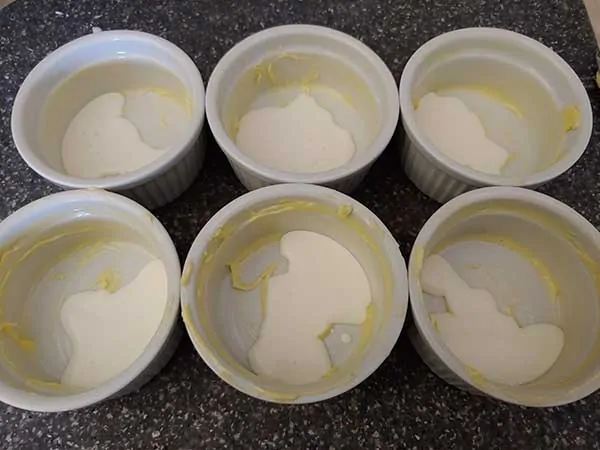
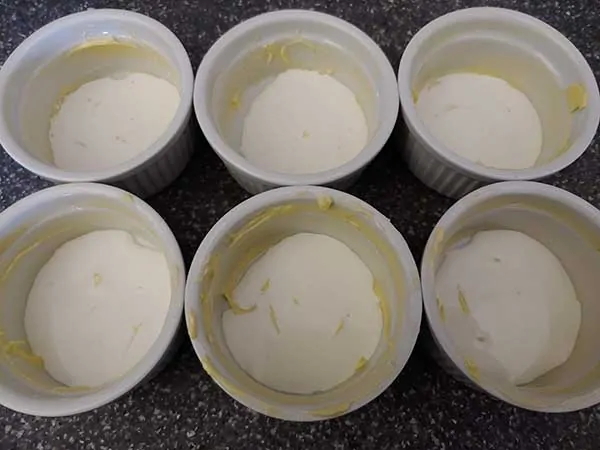
- Crack one egg into each ramekin.
- Then top each egg with 1 tablespoon of grated Parmesan cheese.
- Finally, crack some black pepper on top of cheese. As much or as little as you prefer.
- Add trivet to pot, along with 2 cups of water.
- Place 3 ramekins on trivet, followed by second layer of 3 ramekins. Stack them in an alternating pattern, not directly on top of ramekins below. Lock lid and cook on low pressure for 2 minutes for runny yolks, 3 minutes for hard yolks. (See note on pressure level)
- Once cook time is complete, quick-release pressure. Remove lid and transfer ramekins to a rack to cool. Serve immediately.
To make in silicon egg mold:
- Follow directions above, but increase the cook time to 8 minutes for runny yolks, 9 minutes for soft yolks, and 10 minutes for fully cooked yolks. (See note on pressure If your eggs are not as cooked as desired, place back in the Instant Pot and cook for one additional minute.
Notes
- When using ramekins, this recipe works best when cooked on low pressure. If your pressure cooker does not have a low pressure setting, you may use high pressure, but it will be more difficult to achieve soft yolks. However, when cooking eggs in a silicone egg bites mold we have found that you can use either high or low pressure, with the same exact cook time for both. The results will remain the same.
- The yolks in the top layer will be slightly soft with this method. If you prefer all yolks to be fully-cooked, allow a natural pressure release for 3 minutes, then quick-release remaining pressure.
- The top of the eggs will be creamy. If your whites appear runny, it may actually just be the combination of cream and melted parmesan on top. Check for doneness by using a spoon to gently pull egg white away from side of ramekin. If eggs are very jiggly and undercooked, place back in IP and cook for 1 more minute at low pressure. Then, serve immediately or let sit on keep warm until desired doneness is achieved.
- Many factors can lead to a need to adjust the cook time. Those living in higher altitudes may need to increase the cook time. The temperature of your eggs may also impact cook time. We use refrigerated eggs for this recipe, not room temperature. Room temperature eggs will cook more quickly.
FAQS
What kind of ramekins does this recipe use? We use these 4 oz. ramekinsNutrition
THIS POST MAY CONTAIN AFFILIATE LINKS. TO FIND OUT MORE VISIT OUR DISCLOSURE PAGE.


Sandy
I think this is wonderful. Is it possible to put 2 eggs in one ramkin?
Gary
That should work! I would try 5 minutes.
Becky
Made these this morning and they turned our great!
Beverly Eide
What size pot were you using and what size ramekins?
Gary
6qt IP and 4oz ramekins.
Erica
What if my pot doesn't have a low pressure setting?
Linda
Mine also doesn't have low pressure setting....maybe a shorter cook time?
Gary White
Maybe try setting it for zero "0" minutes on manual.
Carol
Would sour cream or yoghurt sub for heavy cream on the bottom?
Gary
You can sub with melted butter. I wouldn't recommend subbing with sour cream, as it may not do well when heated and we haven't tested it.
Bob
Hi - this sounds delicious, but do you think I could make just 2 servings? 2 ramekins with 1 egg each?
Gary White
Definitely.
Sharra
I really Love the shredded parm versus the grated but these are definitely my new fave! Thank you! Side not i did 2 ramekins for 2 mins low pressure because it was just me eating them.
Stacy Cobb
After seeing this recipe I went straight to Amazon and bought ramekins. Made these the next day and I have to say it was worth buying ramekins for! Husband approved as well 🙂
Barbara
Do you think you could do these in the silicone egg bite molds?
Gary White
Yes, that should work.
Claire
Can I refrigerate and reheat?
Gary White
Yes, we always do.
Kelly
Excellent, easy to make and turned out exactly as the recipe says. This will be a go-to item in our household!
Connie Henckel
I just did this in my 6 qt instant pot. I don't have a low pressure setting, so I did 0 minutes on manual and all 6 had hard yolks! 🙁 I can't adjust the time any lower than zero, so I guess I won't be making them again… Yummy flavor, but kids will only eat runny yolks.
John
Love these eggs!
Katie
My family loved this recipe! It was easy to make and will be one of our new go-to recipes. Thanks!
Meg
Easy and so delicious!
Esther King
This is the EASIEST way to make eggs literally ever, not to mention delicious! My 11 month old daughter and I both ate these eggs with gusto. Thanks!
Lorna Woodhams
They are delicious! I make them often. I usually just make 1 or 2 because I live alone.
Rebecca
So happy you developed a recipe using egg bites mold. I think they turned out even better than using ramekins, which is saying a lot because I really liked them that way. Thank you!
Tara
Hi, how long did you do using the egg molds? Were the yolks soft or hard? Thanks!
Jim
Amazing absolutely amazing. Also try diced fried bacon on the bottom with gruyere cheese slicesand then follow the recipe above. This is called "eggs Lorraine" it's also amazing. You can take this as far as you want.
Mere
Did you use the Pressure Cook setting or the Egg setting?
Gary White
Manual pressure cook setting.
Mlb
Can these be made a day ahead?
Gary White
Yes!
LYLE A LARIVIERE
Wouldn't a 3 oz Ramekin be better for a less flat egg?
Gary White
Possibly, but would cook differently.
Fiona
So happy for these guidelines! I did two eggs in each yogurt pot-style ceramic container, right in the water (couldn’t find my rack). 4 min were just past medium - I’m excited to try 3 min next time!