

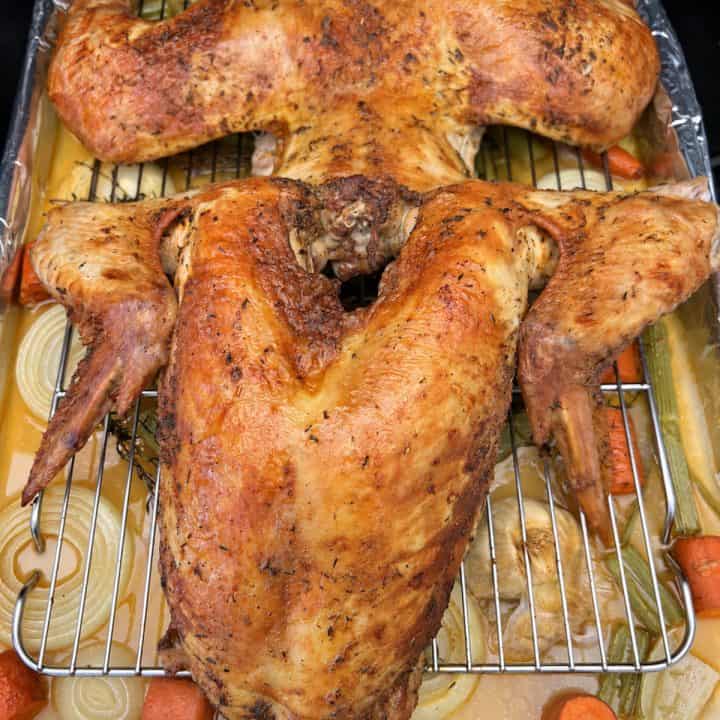

This frog turkey recipe uses a 48-hour dry brine for well-seasoned meat and crisp skin, then opens the bird flat for roasting at 425°F with the backbone still attached. Brine it whole. Open it on roasting day.
Real Talk
Refrigerator space was the practical problem to solve. A turkey takes up enough room before you open it out, so I kept this one whole for the dry brine and made the frog-style cuts afterward.
The main recipe is for an unbrined 12–14-pound turkey. If yours is already salted or enhanced, use the pre-brined option below.
What Is Frog Turkey?
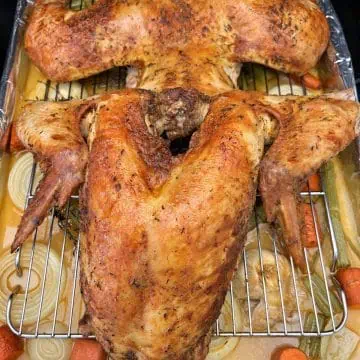
Frog turkey, also called frog-style or frogged turkey, is opened along both sides so the breast folds away from the back and legs. The breast stays attached near the neck, the backbone stays in, and the bird spreads out with the skin facing up.
Frog Turkey vs. Spatchcock Turkey
- Backbone: Frog turkey keeps it in place; spatchcock turkey has it removed.
- Cuts: The frog method opens the sides between the breast and thighs. You may still need to snip ribs with sturdy shears.
- Shape: The frog cut folds the breast away from the legs; spatchcocking opens the bird from the back and flattens it into one broad piece.
- Cooking: Both spread the bird flat. Size and oven temperature still affect the cooking time, so follow the recipe and check doneness with a thermometer.
At a glance: Use a 12–14-pound turkey, dry-brine for 48 hours, then roast at 425°F. Start checking at 90 minutes and plan on about 1 hour 45 minutes of roasting, followed by a 20-minute rest. Thawing time is extra.
How Many People Does a 12–14-Pound Turkey Feed?
Plan on about 12 generous servings, or up to 20 smaller portions with plenty of sides. For a generous holiday portion, allow roughly 6–8 ounces of cooked turkey per adult; buy extra if you want substantial leftovers.
The package weight includes bones and other parts you won't serve. USDA's yield estimates put a whole turkey sold with its neck and giblets at about 6.7 ounces of cooked meat without skin per raw pound. That works out to roughly 5–6 pounds of meat from a 12–14-pound bird. Treat this as a planning estimate; your bird, cooking, and carving will affect the yield.
Where Did Frog-Style Turkey Come From?
Frog-style turkey has older relatives in French cooking. Escoffier's 1903 Le Guide Culinaire describes chicken à la crapaudine, opened and flattened with the two sections still attached.
In June 2009, Kitchen Conservatory documented “leaping frog” chicken with the backbone left in, crediting Gourmet magazine. These are earlier related preparations; they don't establish who invented today's frog-style turkey cut. For the modern turkey version, Ron Dimpflmaier credits Al Frugoni with popularizing the method.
Why This Recipe Works
- Salt gets time to season the bird. A dry brine uses the turkey's own moisture rather than a container of salt water.
- The skin dries uncovered. The refrigerator rest gives the surface time to dry before it reaches the hot oven.
- A small amount of baking powder helps the skin. The 2 teaspoons are mixed evenly into the dry brine to encourage browning and crisping.
- The frog shape opens the bird out. The breast and leg sections lie spread out on the rack, with more skin exposed to the oven's heat.
- Broth protects the pan aromatics. The cup beneath the rack keeps the vegetables and drippings from starting in a dry pan.
Ingredients
Turkey
- 1 whole turkey (12–14 pounds; unbrined and fully refrigerator-thawed)
Dry Brine
- 3 ½ tablespoons Diamond Crystal kosher salt OR 2 tablespoons Morton's kosher salt; use one, not both
- 2 teaspoons baking powder (not baking soda)
- 1 tablespoon garlic powder
- 1 tablespoon onion powder
- 1 tablespoon dried thyme and rosemary (any combination; 1 tablespoon total)
- 2 teaspoons smoked paprika
- 1 teaspoon ground sage
For the Roasting Pan
- 3 large carrots, cut into large chunks
- 4 celery stalks, cut into large pieces
- 2 yellow onions, thickly sliced
- 2 garlic heads, halved crosswise
- 3 sprigs fresh rosemary
- 6 fresh sage leaves
- 6–8 sprigs fresh thyme
- 1 cup chicken broth
- Lemon, thinly sliced (optional)
Optional Skin Coating
- 3 tablespoons bacon fat, melted; use enough for a thin coating before roasting
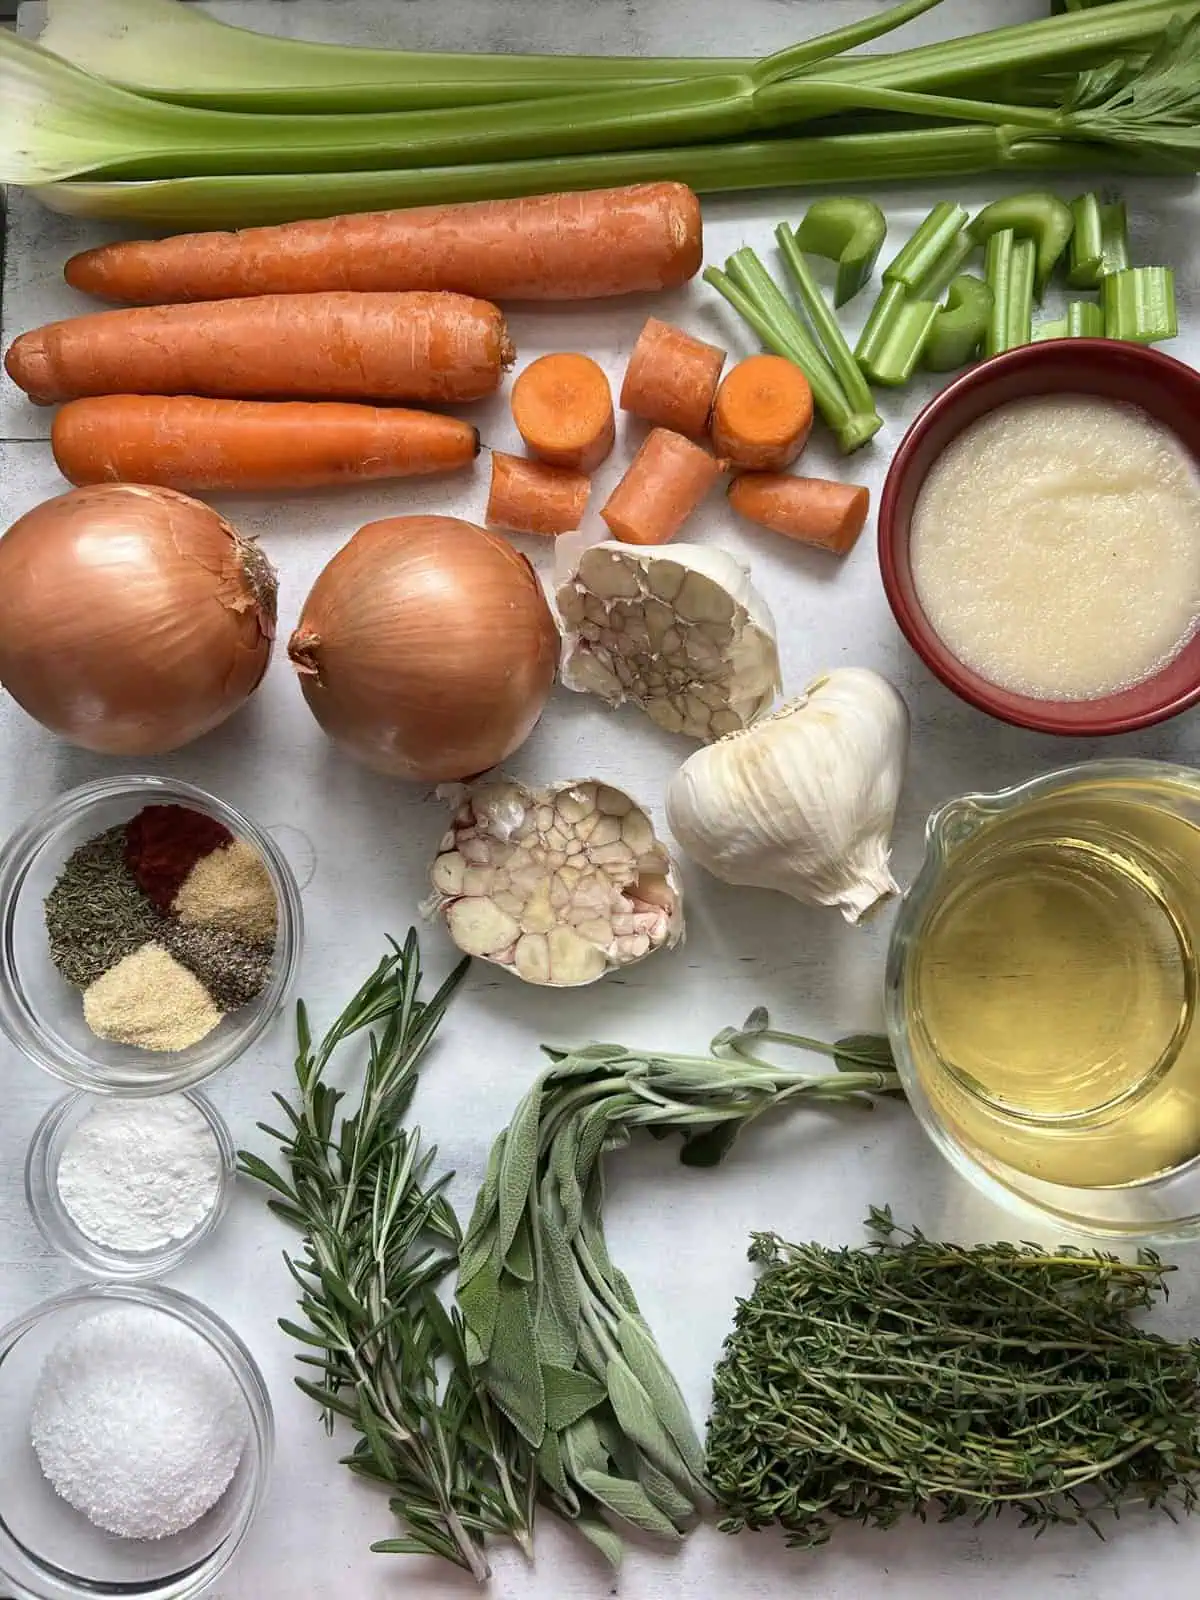
Start with an unbrined 12–14-pound turkey
Use an unbrined turkey for this recipe. If the label says pre-brined, self-basting, or enhanced with a salt solution, follow the pre-brined option below.
Plan ahead: Allow about 3–4 days to thaw a frozen 12–14-pound turkey in a refrigerator at 40°F or below, then 48 hours for the dry brine. Start brining as soon as the turkey is fully thawed; the brine uses the 1–2 days it can remain refrigerated after thawing. For a Thursday roast, start the brine on Tuesday at the same time of day you plan to roast. See USDA's turkey thawing guidance.
Use the salt amount for your brand
Use the salt amount listed for your brand. Diamond Crystal and Morton's have different crystal sizes and densities, so they're not interchangeable tablespoon for tablespoon.
Why baking powder goes on the skin
The baking powder is for the skin. It helps the surface brown and crisp; it is not a coating of flour or breading. Serious Eats explains the technique, including why baking soda is a poor substitute.
Use 2 teaspoons baking powder, whisked evenly into the mixture. Keep the seasoning on the outside skin. Nothing needs to go underneath it.
Fresh aromatics and optional bacon fat
Fresh rosemary, sage, and thyme go in the roasting pan with the vegetables and garlic. Those quantities are flexible. Cut the carrots and celery into large pieces, slice the onions thickly, and halve the garlic heads across the cloves.
Bacon fat is optional. Brush a thin coating on the skin just before roasting, using about 3 tablespoons as a starting amount. The chicken broth goes in the pan beneath the rack, not over the turkey.
If your turkey is already pre-brined
If your turkey is already salted, skip the full dry-brine mixture. Follow the pre-brined instructions in the recipe notes for the separate air-dried, herb-only preparation.
Check the fit before roasting day
Use a sturdy rimmed sheet pan and an oven-safe rack large enough for the opened turkey. Check the pan against your oven before you begin; the breast and leg sections need room to spread out without hanging over the rim.
The whole bird is easier to fit in the refrigerator for the brine. The opened bird needs its full footprint only when it goes onto the roasting rack.
How to Make Frog-Style Turkey
Step 1: Mix the dry brine and dry the turkey
Whisk together the dry-brine ingredients, using the salt amount listed for your brand. Break up any baking-powder clumps so the mixture coats the skin evenly.
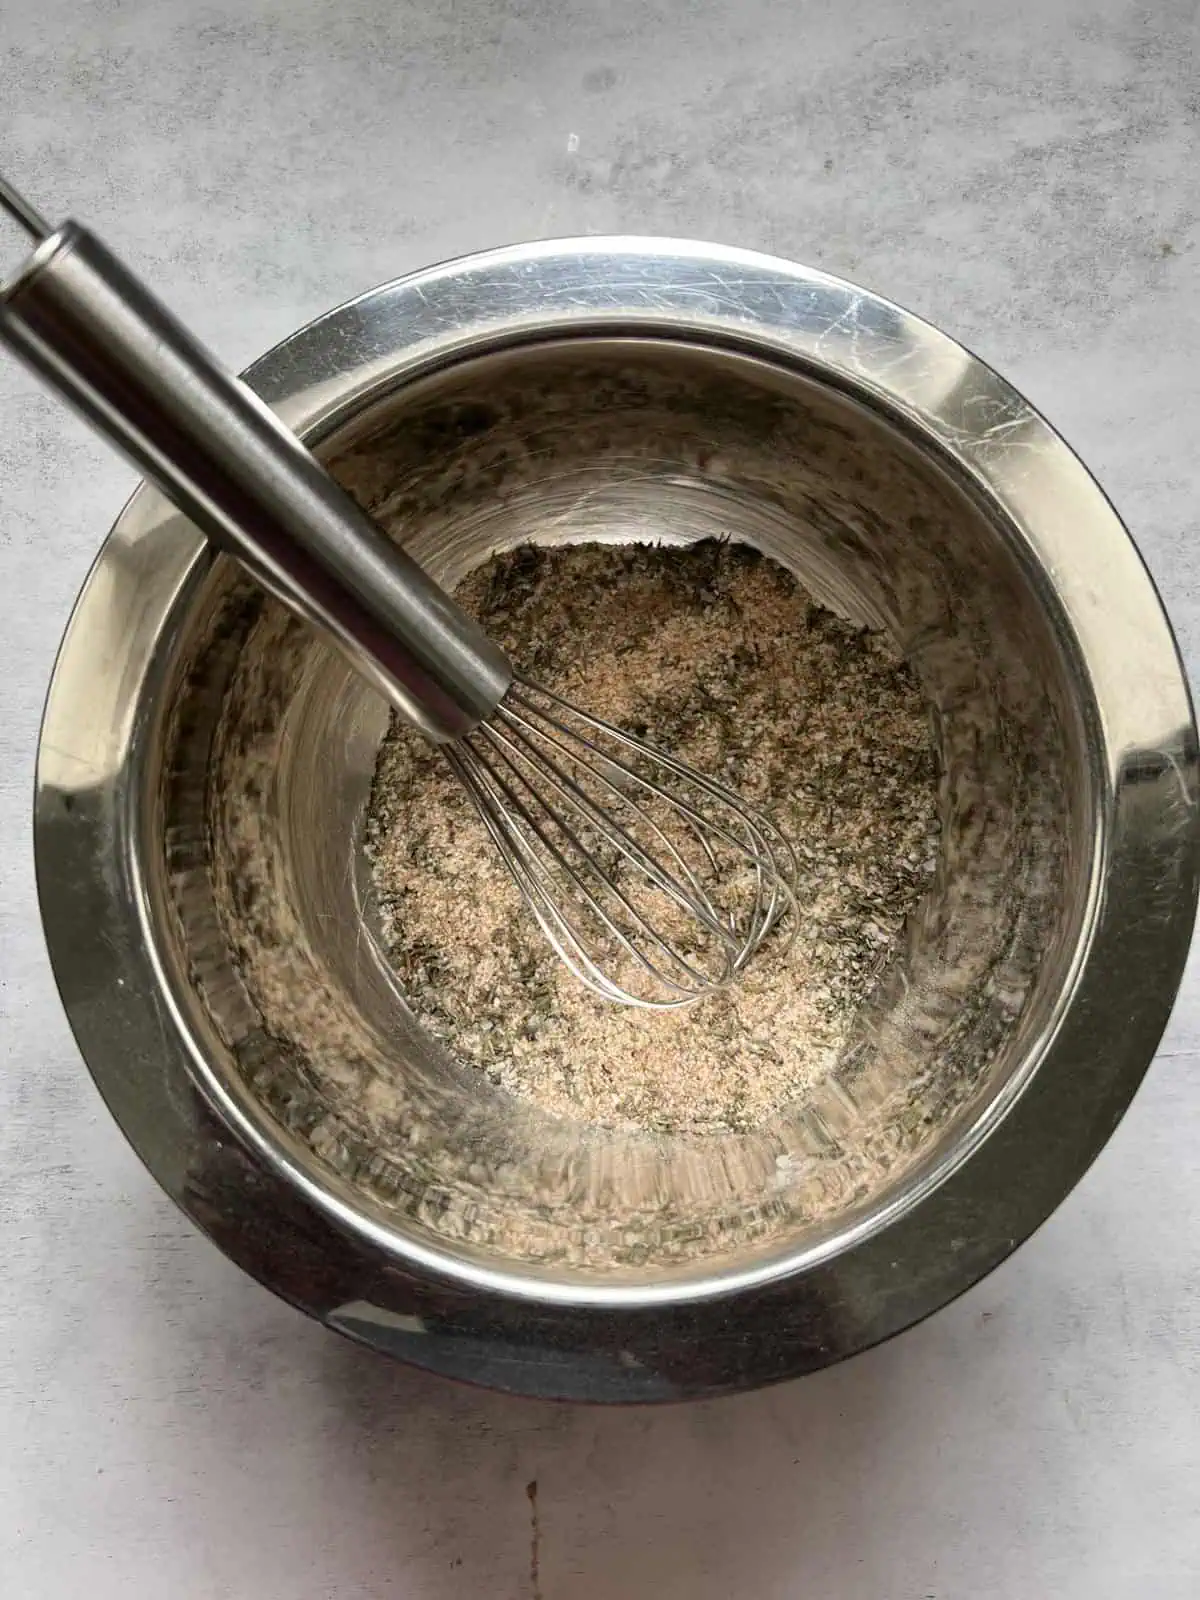
Remove the neck, giblets, and any packaging or leg restraint from the fully thawed turkey. Pat the skin dry with paper towels. Leave the bird whole for now.
Step 2: Season and refrigerate for 48 hours
Spread the dry-brine mixture evenly over the outside skin, including the breast, legs, wings, and back. Keep it on the surface; nothing goes under the skin.
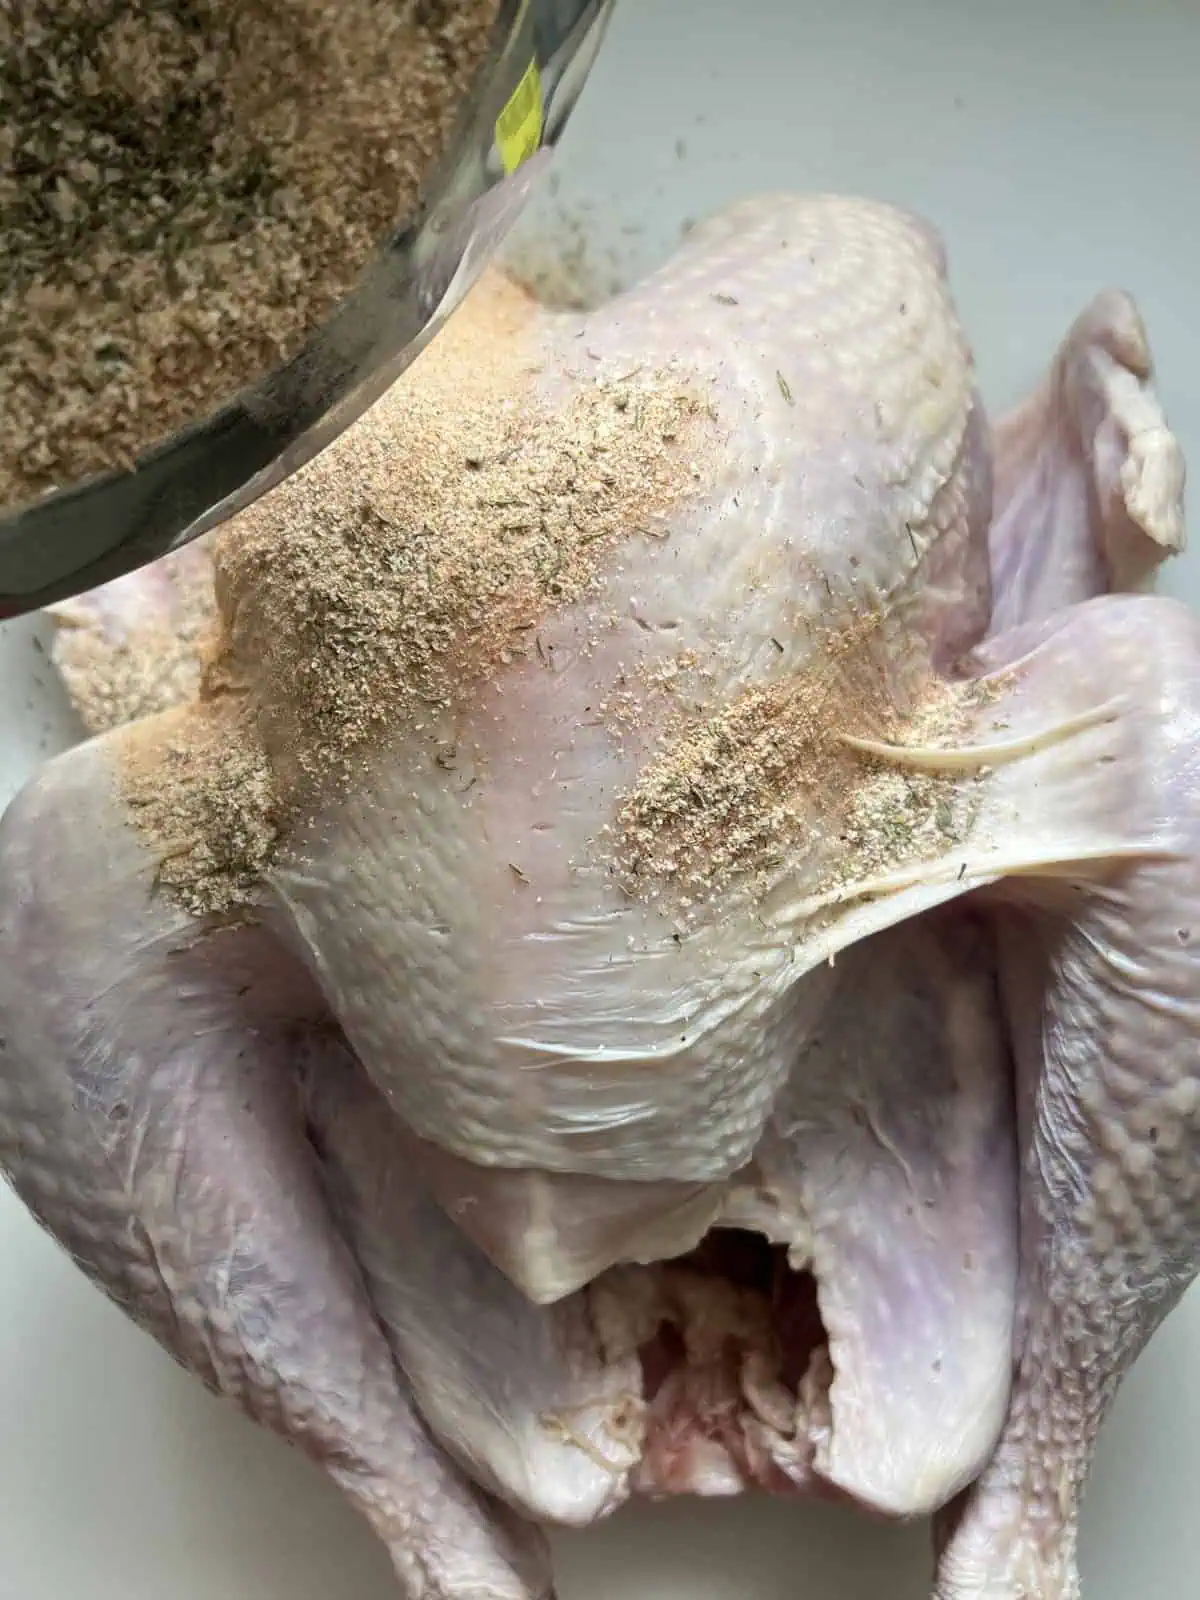
Set the whole turkey on a rack over a tray that will catch drips. Refrigerate uncovered for 48 hours at 40°F or below, keeping it away from ready-to-eat food.
Thaw completely before brining. The 48-hour brine counts toward the 1–2-day refrigerated holding window after complete thawing or after purchasing a fresh turkey.
Step 3: Make the frog-style cuts
On roasting day, place the turkey on a large, stable cutting board. Start at the cavity opening between the breast and one thigh. Use sturdy kitchen shears to cut along that side, working forward toward the neck through the ribs. Repeat on the other side. These cuts let the breast section hinge open while staying attached near the neck.
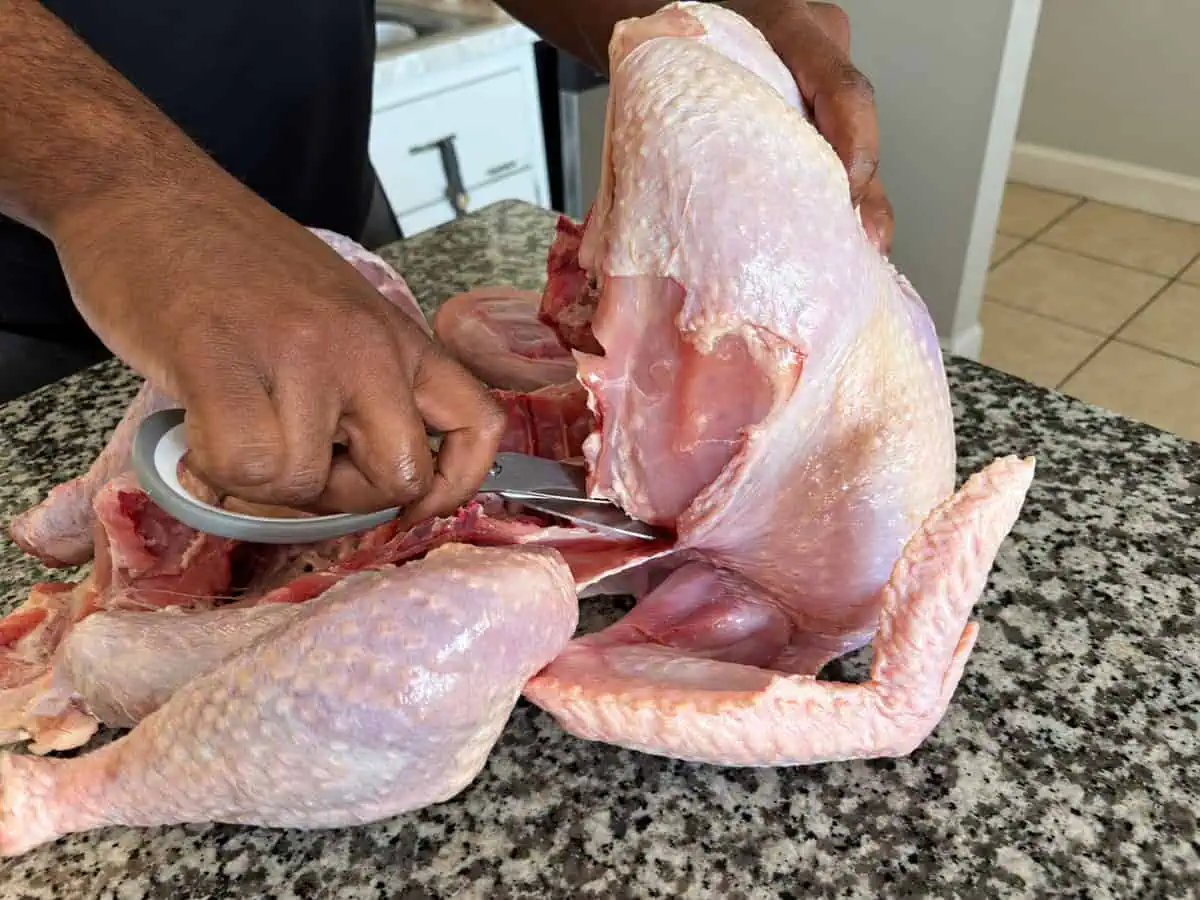
Lift and gently fold the breast section away from the back and legs. Snip any remaining ribs or tissue that prevent it from opening. Keep the breast attached at its hinge and leave the backbone in place.
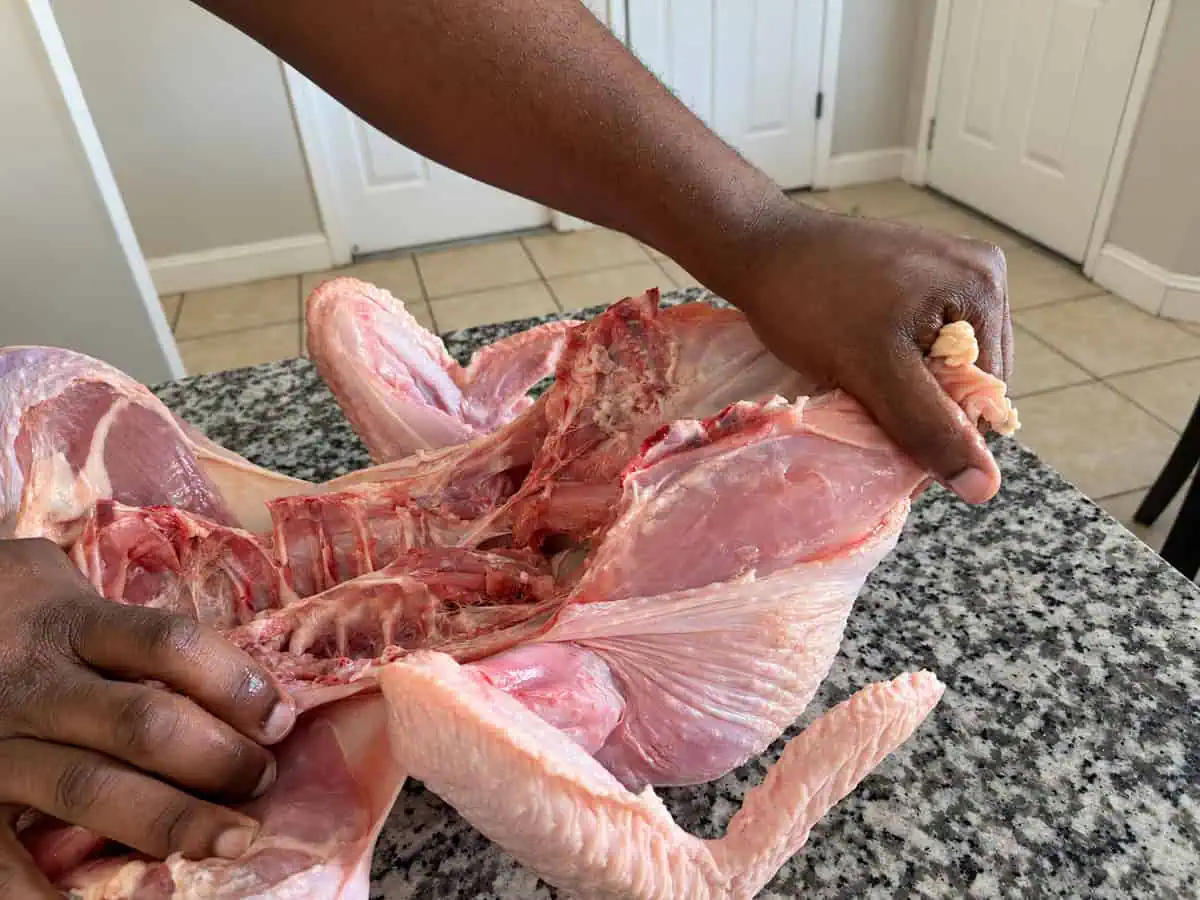
Turn the opened turkey skin-side up. Press down firmly on the breast and each thigh until they lie flatter. Spread the leg section away from the breast so the bird forms the frog shape.
Tuck the wing tips under the breast, or snip them off at the joint, to keep them from scorching.
Step 4: Prepare the oven and roasting pan
Preheat the oven to 425°F. Position an oven rack so the turkey and pan have clearance from the heating element above.
Line a sturdy rimmed sheet pan with foil. Arrange the carrots, celery, onions, garlic, optional lemon slices for more flavorful pan drippings, and fresh herbs in the pan, then pour in 1 cup chicken broth. Set an oven-safe wire rack over the aromatics.
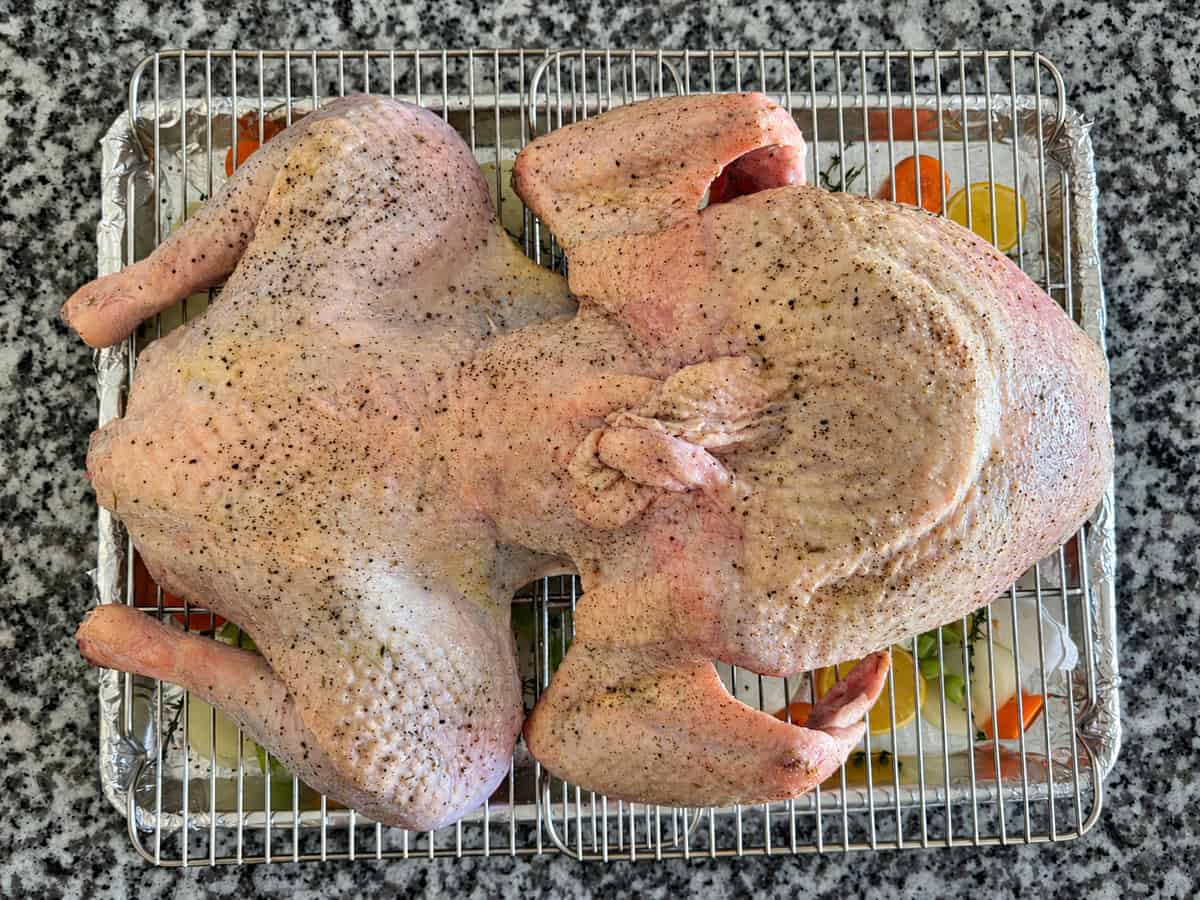
Transfer the opened turkey to the rack skin-side up. If using bacon fat, brush a thin coating over the skin now, just before roasting. About 3 tablespoons is a starting amount; use enough to coat the surface lightly.
Step 5: Roast and start checking at 90 minutes
Roast at 425°F throughout. Begin checking the internal temperature at 90 minutes. Plan on about 105 minutes of roasting, but the thermometer determines when yours is finished.
Turkey is safe at 165°F. For more tender dark meat, I prefer taking both leg quarters to 180°F, measured in the innermost thigh without touching bone. Also check the thickest part of the breast and the innermost wing on both sides; they should each reach at least 165°F, following USDA's safe cooking guidance.
Keep an eye on the pan liquid when you check the turkey. If it has evaporated and the aromatics are beginning to scorch, add a little more broth to the pan, avoiding the skin.
Step 6: Rest and carve
Transfer the turkey to a carving board and rest for 20 minutes before slicing.
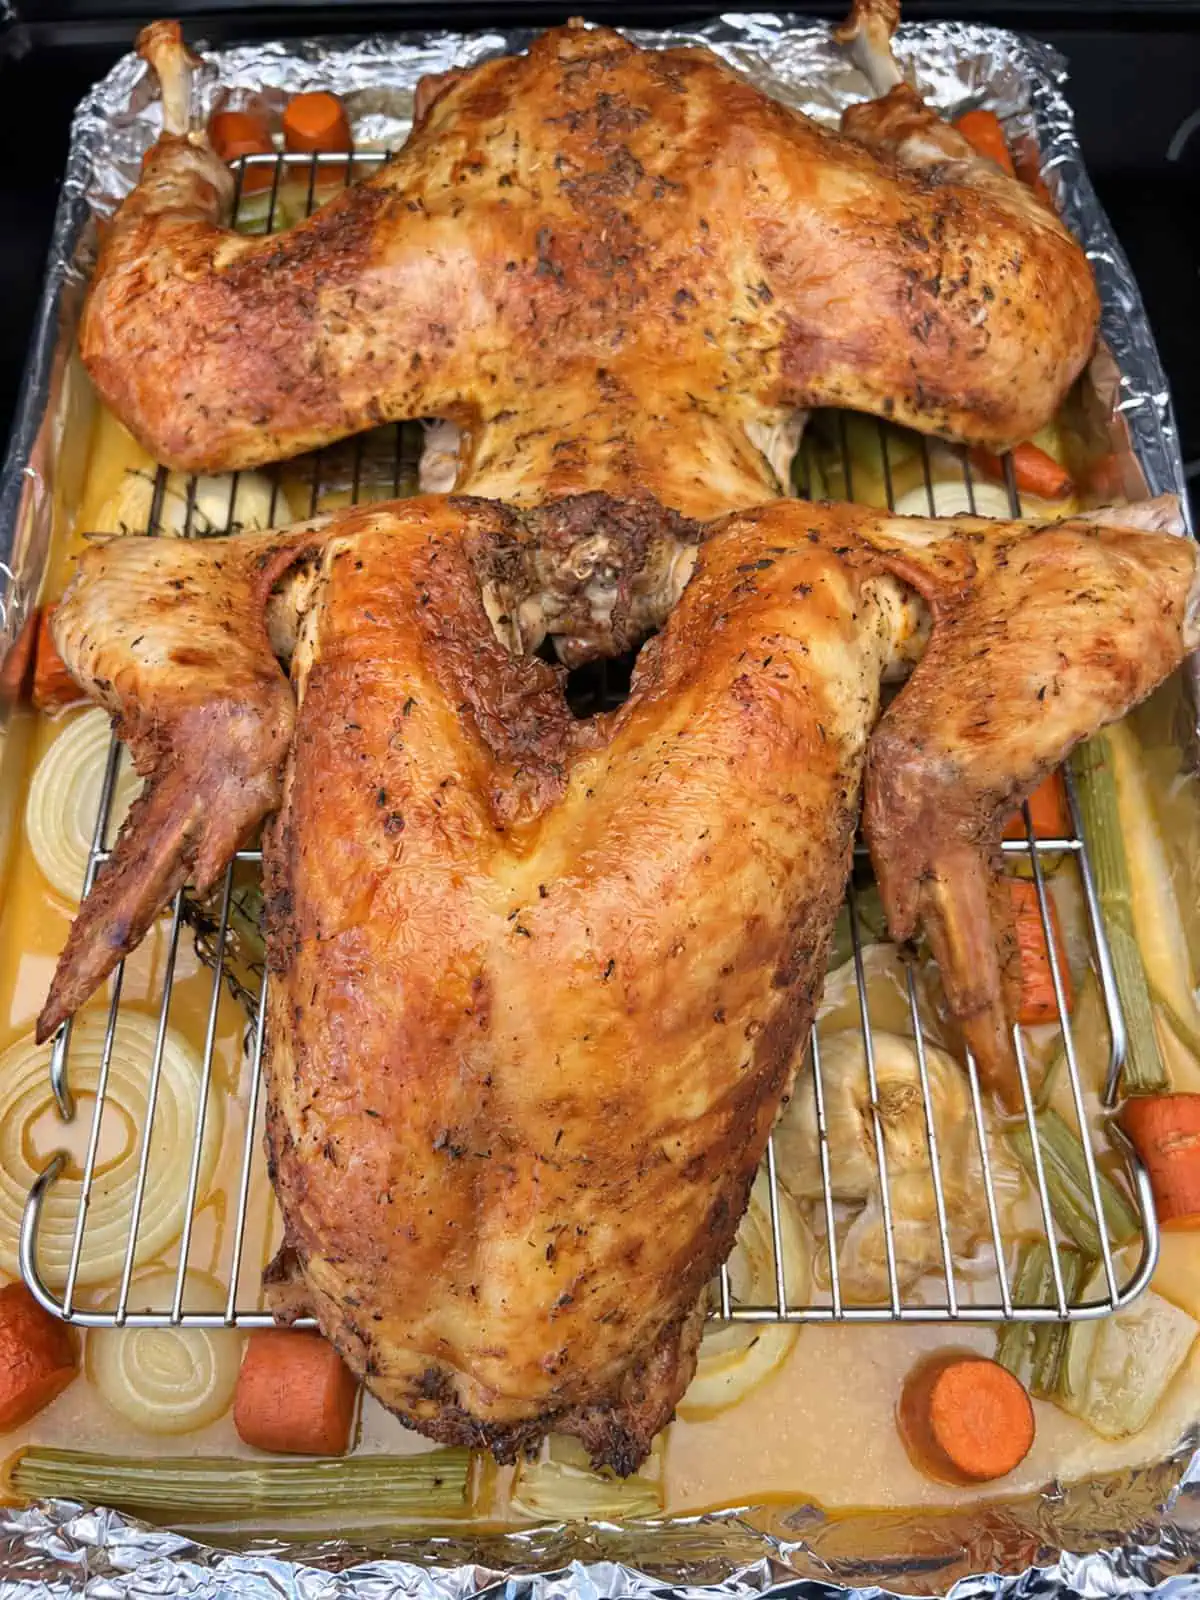
Separate the leg quarters and wings at their joints. Remove each breast half from the breastbone, then slice across the grain. Separate the thighs from the drumsticks if desired and serve.
Frog-Style Turkey FAQs
The breast section opens away from the back and leg section while remaining attached. The bird spreads into a frog-like shape with its skin facing up. The backbone stays in place.
Yes. That is the order used here: keep the turkey whole for its 48-hour refrigerator brine, then make the frog-style cuts on roasting day. This is helpful when an opened turkey would take up too much refrigerator space.
Yes, but skip the full dry-brine mixture. See the pre-brined turkey section for the alternative preparation.
No. Use 2 teaspoons baking powder for this recipe. Baking soda is not an interchangeable substitute and can give the skin an unpleasant taste.
Start checking at 90 minutes and plan on about 105 minutes. Use the thermometer checks in Step 5 to decide when the turkey is done.
The cut also works on larger birds, but an 18-pound turkey needs more pan and oven space and a longer roast. Start checking at 90 minutes and use the thermometer targets in Step 5 to decide when it is done. The seasoning amounts and timing here are for 12–14-pound turkeys; the multiplier buttons are for additional birds, not a tested larger-bird version.
Carve the remaining turkey and refrigerate it in shallow containers within 2 hours. Use within 3–4 days or freeze it. Reheat leftovers to 165°F.
More Thanksgiving Recipes
For other turkey options, try my Spatchcock Turkey with Butter-Soaked Cheesecloth, Instant Pot Whole Turkey, or Instant Pot Turkey Breast.
Use my Thanksgiving Dinner Game Plan to choose the sides around your turkey. Southern Cornbread Dressing and Maple Bacon Brussels Sprouts are two places to start.
Did you make this Frog-Style Turkey?
Please leave a star rating and tell me how it turned out!
📖 Recipe
Frog-Style Turkey with a 48-Hour Dry Brine
Equipment
- Sturdy kitchen shears
- Large cutting board
- Rimmed sheet pan with oven-safe wire rack
- Instant-read thermometer
Ingredients
Turkey
- 1 whole turkey 12–14 pounds; unbrined and fully refrigerator-thawed
Dry Brine: Salt (Choose One)
- 3 ½ tablespoons Diamond Crystal kosher salt use this OR the Morton's option below, not both
- 2 tablespoons Morton's kosher salt use this instead of Diamond Crystal, not in addition to it
Dry Brine: Remaining Ingredients
- 2 teaspoons baking powder not baking soda
- 1 tablespoon garlic powder
- 1 tablespoon onion powder
- 1 tablespoon dried thyme and rosemary any combination; use the listed amount in total
- 2 teaspoons smoked paprika
- 1 teaspoon ground sage
For the Roasting Pan
- 3 large carrots cut into large chunks
- 4 celery stalks cut into large pieces
- 2 yellow onions thickly sliced
- 2 garlic heads halved crosswise
- 3 sprigs fresh rosemary
- 6 fresh sage leaves
- 6–8 sprigs fresh thyme
- 1 cup chicken broth
- lemon thinly sliced; optional
Optional Skin Coating
- 3 tablespoons bacon fat melted; use enough for a thin coating before roasting
Instructions
- Whisk together the dry-brine ingredients, using the amount listed for your chosen salt brand. Use only one of the two salt options. Break up any baking-powder clumps. Remove the neck, giblets, packaging, and any leg restraint from the fully thawed turkey. Pat the skin dry.
- Spread the mixture evenly over the outside skin of the breast, legs, wings, and back. Do not put seasoning under the skin. Place the whole turkey on a rack over a drip-catching tray and refrigerate uncovered at 40°F or below for 48 hours. If starting with a frozen turkey, thaw it completely in the refrigerator first; those thawing days are separate. The 48-hour brine counts toward the 1–2-day refrigerated holding window after complete thawing or after purchasing a fresh turkey.
- On a large, stable cutting board, start at the cavity opening between the breast and one thigh. Cut along that side toward the neck through the ribs with sturdy kitchen shears. Repeat on the other side. These cuts let the breast section hinge open while staying attached near the neck. Fold the breast section away from the back and legs, snipping any remaining ribs or tissue that prevent it from opening. Keep the breast attached at its hinge and leave the backbone in place. Turn skin-side up and press the breast and each thigh flatter, spreading the leg section away from the breast. Tuck the wing tips under the breast, or snip them off at the joint, to keep them from scorching.
- Preheat the oven to 425°F and position a rack with room above the turkey. Line a sturdy rimmed sheet pan with foil. Add the carrots, celery, onions, garlic, and fresh herbs, plus optional lemon slices for more flavorful pan drippings. Pour in the chicken broth. Set an oven-safe wire rack over the aromatics and place the turkey skin-side up on it. If desired, brush the skin lightly with the melted bacon fat just before roasting.
- Roast at 425°F throughout. Begin checking at 90 minutes and plan on about 105 minutes of roasting. Turkey is safe at 165°F. For more tender dark meat, I prefer taking both leg quarters to 180°F, measured with an instant-read thermometer in the innermost thigh without touching bone. Also check the thickest part of the breast and the innermost wing on both sides; they should each reach at least 165°F. The thermometer determines doneness. If the pan liquid evaporates and the aromatics begin to scorch, add a little broth to the pan without wetting the skin.
- Transfer to a carving board and rest for 20 minutes. Separate the leg quarters and wings at their joints. Remove the breast halves from the breastbone and slice across the grain. Separate thighs from drumsticks if desired, then serve.


Leave a Reply