
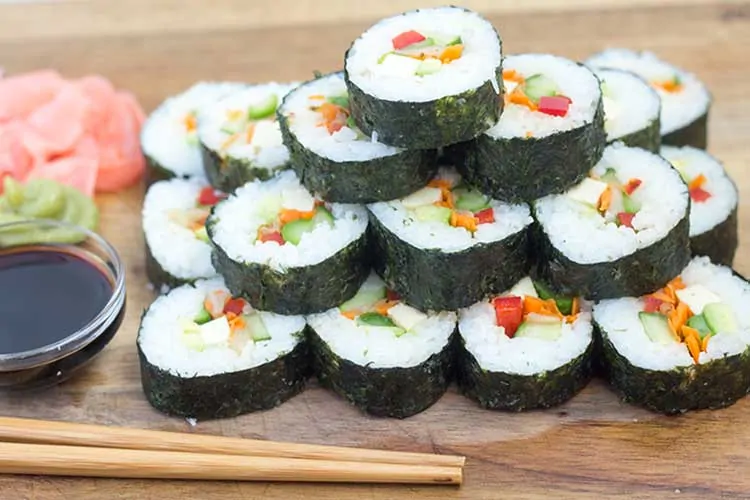
This vegan sushi recipe has a taste that beats out the likes of the familiar shrimp, Philadelphia, and California rolls. And easily made with a Sushezi!
There are few foods in life I enjoy as much as sushi rolls. I have been know to put down a few dozen pieces in a single sitting. Recently, I was asked to bring an assortment of sushi rolls to a dinner party. And of all the rolls I brought, who would've thought that this vegan sushi recipe would be my favorite... Hands down!
Do I really need a Sushezi to make this recipe?
Short answer: No. You can roll these by hand and still have an incredibly delicious sushi roll, but believe me- once you try making sushi using a Sushezi, you'll never go back.
I received a Sushezi last Christmas from my mother-in-law and it has changed our lives. My sushi before tasted good, but did not look impressive at all. Well, now my rolls are perfect ever single time!

Why This Recipe Works So Well
My favorite part of any recipe is the acidity. I can look at the ingredients list of any recipe and tell whether or not I'm going to like it. The secret to well-balanced food is acidity. And sadly, it's often overlooked. Acidity in food is simply adding either vinegar or citrus juice. It makes your taste buds come alive! It makes them pop! Food without acidity is flat.
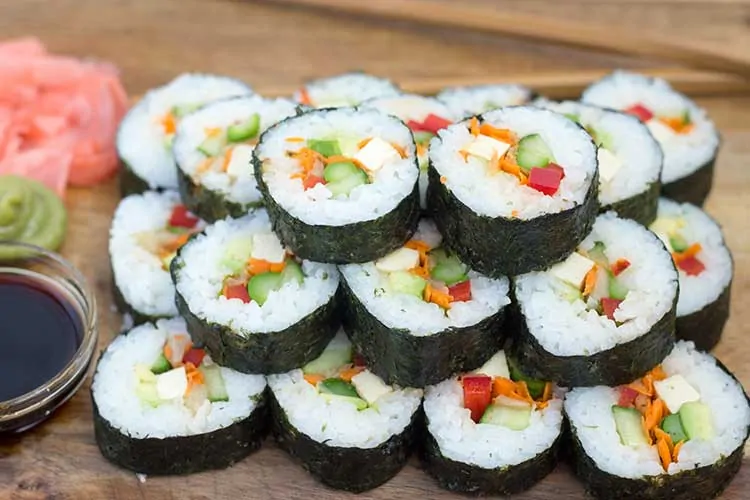
That being said... the secret ingredient to this vegan sushi recipe is the KIMCHI! Might sound scary, or even be scary on its own. But when playing a supporting role, it actually becomes the star! And while kimchi is not technically an acid component, it pretty much acts as one in this roll. Plus there's lots of vinegar in the rice, lol.
How to Make This Vegan Sushi Recipe


And This Is The AMAZING Reward...
★ Did you make this vegan sushi recipe?
Please give it a star rating below! ★
📖 Recipe

Vegan Sushi
Ingredients
- 2 cups short-grain Japanese rice
- 2 cups water
- ¼ cup white wine vinegar
- ¼ cup seasoned rice vinegar
- 1 ½ tsp. salt
- 2 Tbsp. sugar
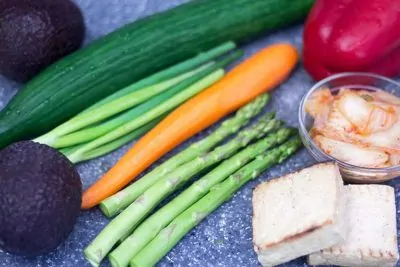
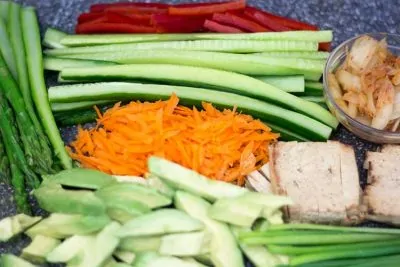
- 1 avocado thinly sliced
- 1 seedless cucumber thinly sliced, core removed
- 1 red bell pepper thinly sliced
- 1 carrot grated
- 3 asparagus blanched, halved lengthwise
- 3 green onions halved lengthwise
- ½ cup kimchi diced
- 2 oz. extra firm teriyaki tofu thinly sliced
- 6 large nori sheets
Instructions
Rice
- In a fine mesh strainer - Rinse rice under running water for about 2 minutes, Then let dry for a few minutes.
- Add rice and water to Instant Pot (or rice cooker) and use rice setting - low pressure for 12 minutes. Once cook time is complete, allow pressure to naturally release - about 10 minutes.
- Meanwhile, in a small bowl - combine white wine vinegar, rice wine vinegar, salt, and sugar. Microwave for 1 minute, then stir until completely dissolved.
- Transfer rice to glass dish. Then using a wooden spoon, gently add vinegar mixture and mix well to combine.
- Let cool, the use in your favorite rolls.
Rolls
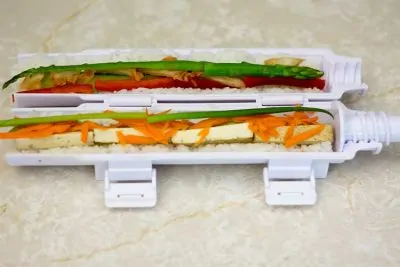
- Prepare veggies according to ingredient list. The goal is to have them all about the same diameter. They will roll much easier if they are closer to the same size.
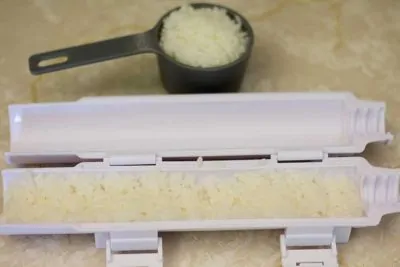
- Add ¼ tsp. of oil to each side of the Sushezi and spread out to coat evenly. (I used a paper towel.)
- Add ½ cup packed rice to each side. The key to making this work is to make sure there’s enough rice to fill both sides. Then pack it down.
- Use the rod/plunger to form a trench in both sides of rice.
- Add veggies to each side, pressing them down into the trench. Place the rod in the end of the Sushezi and line up the grooves. Then carefully (and somewhat quickly) bring together both sides and lock both latches.
- Place the cap on the end of the tube and lock it. Twist the rod in a clockwise motion to pack the inside rice roll.
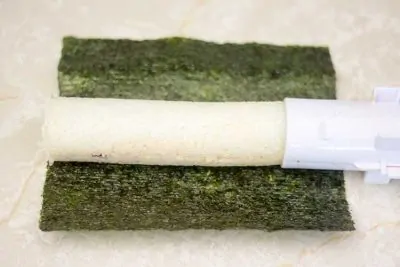
- Remove cap from end and push rod through. Try to make sure the roll comes out where you want it to land, just in case it’s sticky and difficult to move.
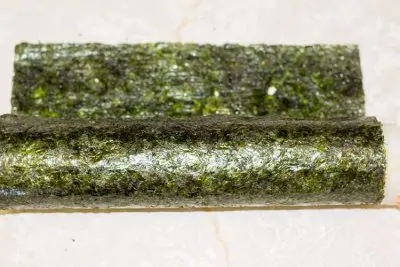
- Wrap the nori around the roll. Use water as an adhesive to help it seal, on the inside and outside. Then, with a very sharp knife, carefully slice roll into 12 pieces.
Notes
Nutrition
THIS POST MAY CONTAIN AFFILIATE LINKS. TO FIND OUT MORE VISIT OUR DISCLOSURE PAGE.


Drew Jones
Haven't tried this exactly but it's very similar to the vegetarian Korean kimbap I make. Never seen this tool before, I want to check it out! Might I suggest adding some Korean pickled radish or even dill pickle, its great!
Nancy
These looks so delicious. i will try out.